Vanilla Pudding
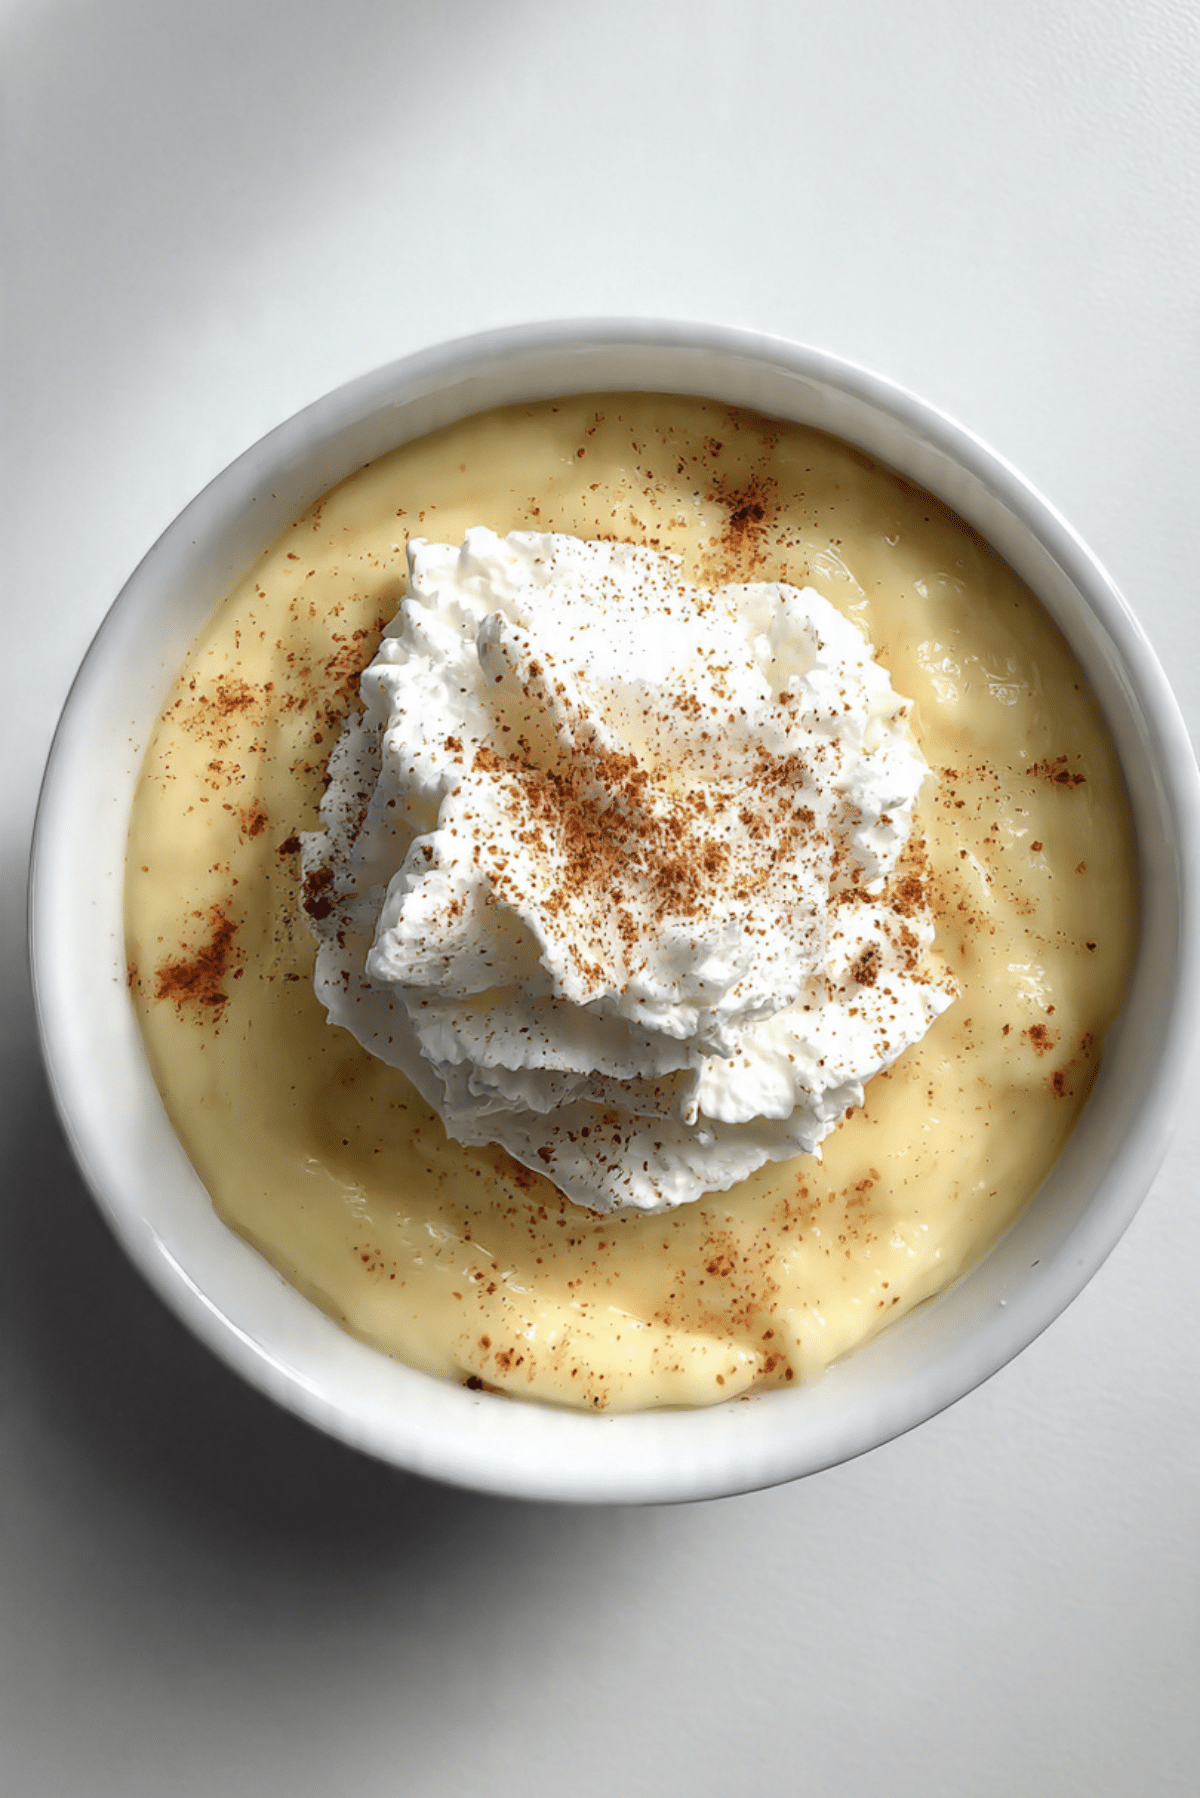
There’s something undeniably comforting about a spoonful of vanilla pudding. From the moment it glides off the spoon to the way it melts across your tongue with that smooth, velvety texture and mellow, sweet flavor — it just feels like home. Whether it’s served warm straight from the pot or chilled in pretty glass cups, this classic dessert brings nostalgia and pure joy in every bite.
Behind the Recipe
This vanilla pudding recipe has been passed around my family for years. It was always the quiet star at our gatherings, tucked between fancier desserts, yet always the first to disappear. I remember standing on tiptoe by the stove as a kid, watching the mixture thicken and sneaking little tastes when no one was looking. There’s just something about the simplicity and the creamy magic that makes it unforgettable.
Recipe Origin or Trivia
Vanilla pudding, in one form or another, has graced tables across the globe. It draws roots from classic European custards, especially the French “crème pâtissière,” which shares similar ingredients and technique. In the United States, it became a staple in the early 20th century as home cooks sought quick, satisfying sweets. The rise of boxed pudding mixes in the 1950s made it even more popular, but nothing beats the depth and flavor of homemade.
Why You’ll Love Vanilla Pudding
Whether you’re making it for a weekday treat or a holiday dessert table, here’s why this recipe is a keeper:
Versatile: Serve it plain, layered in parfaits, or spooned into pies.
Budget-Friendly: Uses common pantry staples without breaking the bank.
Quick and Easy: Just a few steps and ingredients — no baking required.
Customizable: Add toppings, spices, or even swap in plant-based milk.
Crowd-Pleasing: Everyone loves pudding, from toddlers to grandparents.
Make-Ahead Friendly: Chill it in the fridge and it gets even better.
Great for Leftovers: If any’s left, it makes a dreamy breakfast or snack.
Chef’s Pro Tips for Perfect Results
For a silky-smooth pudding that never disappoints, here’s what I’ve learned over the years:
- Use whole milk for the richest flavor and creamiest texture.
- Whisk constantly when cooking to avoid lumps or sticking.
- Temper the egg yolks slowly with the hot milk mixture to prevent curdling.
- Don’t skip the butter at the end — it adds an irresistible glossy finish.
- Let it chill completely before serving for the best consistency and flavor.
Kitchen Tools You’ll Need
Simple tools make this recipe easy to whip up anytime.
- Saucepan: For cooking the pudding over medium heat.
- Whisk: Essential for stirring everything together and avoiding lumps.
- Measuring cups and spoons: To get your ratios just right.
- Heatproof bowl: For tempering the eggs without scrambling them.
- Plastic wrap: To prevent a skin from forming while chilling.
Ingredients in Vanilla Pudding
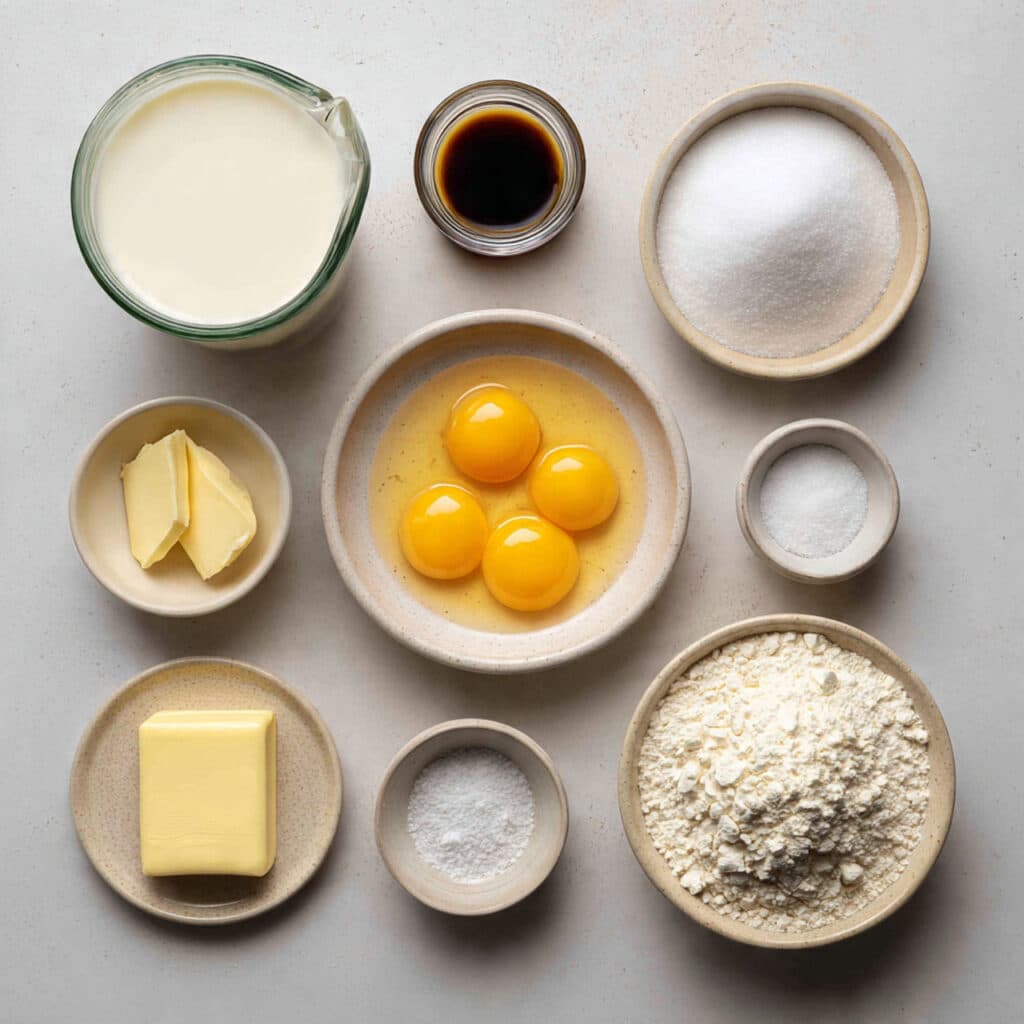
This recipe proves that basic ingredients can make something magical when combined just right.
- Whole Milk: 2 ¾ cups — Forms the creamy base of the pudding.
- Granulated Sugar: ½ cup — Adds the sweetness that balances the richness.
- Cornstarch: ¼ cup — Thickens the pudding to that perfect spoonable consistency.
- Salt: ¼ teaspoon — Enhances the vanilla and balances the sweetness.
- Egg Yolks: 3 large — Adds richness and helps with thickening.
- Unsalted Butter: 2 tablespoons — Gives a smooth, luxurious finish.
- Vanilla Extract: 1 tablespoon — The star flavor that brings it all together.
Ingredient Substitutions
Need to tweak things based on what you have? No problem.
Whole Milk: Use 2% milk or a rich plant-based milk like oat or almond.
Cornstarch: Swap with arrowroot powder or tapioca starch (same amount).
Granulated Sugar: Can be replaced with coconut sugar or light brown sugar.
Egg Yolks: Use whole eggs for a lighter texture, or leave out for egg-free.
Butter: Coconut oil can work for a dairy-free version.
Ingredient Spotlight
Vanilla Extract: The soul of this dessert. A high-quality vanilla extract or paste elevates the flavor beautifully. Don’t skimp — this is where the magic lies.
Cornstarch: This pantry staple is a game-changer for texture. It thickens the pudding without weighing it down, creating that signature silky mouthfeel.
Instructions for Making Vanilla Pudding
Making vanilla pudding from scratch is a little moment of calm in the kitchen — stirring, smelling, and tasting as the magic happens.
- Preheat Your Equipment:
No oven needed, but make sure your saucepan is clean and your whisk is ready. - Combine Ingredients:
In a medium saucepan, whisk together sugar, cornstarch, and salt. Slowly whisk in the milk until smooth. - Prepare Your Cooking Vessel:
Set the saucepan over medium heat. In a separate bowl, whisk the egg yolks until smooth. - Assemble the Dish:
Once the milk mixture is warm (not boiling), slowly pour a ladle of it into the egg yolks, whisking constantly. Then return this egg mixture to the saucepan. - Cook to Perfection:
Cook the combined mixture, stirring constantly, until it thickens and just begins to bubble. Remove from heat and stir in the butter and vanilla extract until fully melted and combined. - Finishing Touches:
Pour the pudding into serving bowls or jars. Cover with plastic wrap directly on the surface to prevent a skin from forming. - Serve and Enjoy:
Chill for at least 2 hours. Serve topped with whipped cream, fruit, or a sprinkle of cinnamon.
Texture & Flavor Secrets
The magic of this pudding lies in the contrast — that silky, custard-like base with the whisper of butter richness and the floral sweetness of vanilla. Letting it chill enhances its creaminess while allowing the flavors to meld. And that first cool, velvety bite? Absolute bliss.
Cooking Tips & Tricks
Here are a few extra gems to make your pudding perfect every time:
- Always stir with a whisk for even thickening.
- Use room temperature eggs for easier tempering.
- A pinch of nutmeg or cinnamon can give it a warm twist.
- For extra richness, add a splash of cream before chilling.
What to Avoid
Here’s how to sidestep common mistakes:
- Don’t stop whisking: This can lead to uneven texture or scorching.
- Avoid high heat: It may cause curdling or over-thickening.
- No skimping on vanilla: It’s the star, so go for the real deal.
Nutrition Facts
Servings: 4
Calories per serving: 290
Note: These are approximate values.
Preparation Time
Prep Time: 10 minutes
Cook Time: 10 minutes
Total Time: 20 minutes
Make-Ahead and Storage Tips
Vanilla pudding is a dream when made ahead. Let it cool, cover tightly with plastic wrap directly touching the surface, and refrigerate for up to 4 days. You can also portion it into jars for easy grab-and-go desserts. Avoid freezing — it affects the texture.
How to Serve Vanilla Pudding
This pudding shines on its own, but you can dress it up too. Try layering it with crushed cookies, sliced bananas, or berries in a trifle dish. A dollop of whipped cream and a sprinkle of cinnamon never hurt either.
Creative Leftover Transformations
Turn leftover pudding into something fresh and fun:
- Layer into parfaits with granola and fruit.
- Spread between cake layers as a creamy filling.
- Use as a base for homemade banana pudding.
Additional Tips
If your pudding is too thick, whisk in a splash of milk.
To avoid lumps, sift your cornstarch before using.
For a little elegance, top with shaved dark chocolate or toasted coconut.
Make It a Showstopper
Serve in glass cups or jars to show off that creamy glow. Garnish with a mint leaf, a dusting of cinnamon, or a few fresh berries for color. Presentation can make even the simplest dessert feel like a luxury.
Variations to Try
- Chocolate Vanilla Twist: Swirl in melted chocolate at the end.
- Coconut Vanilla: Use coconut milk and top with toasted coconut flakes.
- Lemon Vanilla: Add lemon zest for a citrusy note.
- Espresso Vanilla: Stir in a bit of espresso powder for depth.
- Spiced Vanilla: Add cinnamon, nutmeg, or cardamom for warmth.
FAQ’s
Q1: Can I make this without eggs?
Yes, you can skip the yolks and use more cornstarch to thicken, though the flavor will be slightly different.
Q2: Can I use almond or soy milk?
Absolutely, just choose an unsweetened variety and expect a slightly thinner texture.
Q3: Why does my pudding have lumps?
It likely wasn’t whisked enough or the heat was too high. Keep stirring and use medium heat.
Q4: Can I make it sweeter?
Sure! Add an extra tablespoon or two of sugar to suit your taste.
Q5: How long does it last in the fridge?
About 4 days if well covered.
Q6: Is this gluten-free?
Yes, as long as your cornstarch is certified gluten-free.
Q7: Can I double the recipe?
Yes! Just make sure your saucepan is large enough and keep stirring.
Q8: What toppings go best with vanilla pudding?
Whipped cream, fresh berries, crushed cookies, or even caramel sauce.
Q9: Can I freeze it?
Not recommended — freezing changes the creamy texture.
Q10: What’s the difference between pudding and custard?
Custard relies more on eggs for thickening, while pudding uses cornstarch.
Conclusion
Vanilla pudding is one of those desserts that never goes out of style. It’s comforting, creamy, and full of warmth and nostalgia. Whether you’re making it for family or just treating yourself, trust me, this one’s a total game-changer. So grab that whisk and let the sweet magic begin!
Print
Vanilla Pudding
- Total Time: 20 minutes
- Yield: 4 servings
- Diet: Vegetarian
Description
This homemade vanilla pudding is creamy, comforting, and packed with rich vanilla flavor. It’s an easy dessert made with pantry staples and perfect for any occasion.
Ingredients
- 2 ¾ cups whole milk
- ½ cup granulated sugar
- ¼ cup cornstarch
- ¼ teaspoon salt
- 3 large egg yolks
- 2 tablespoons unsalted butter
- 1 tablespoon vanilla extract
Instructions
- In a medium saucepan, whisk together the sugar, cornstarch, and salt. Gradually whisk in the milk until smooth.
- Place the saucepan over medium heat. In a separate bowl, whisk the egg yolks until smooth.
- When the milk mixture is warm (not boiling), ladle a small amount into the yolks while whisking constantly. Return the yolk mixture to the saucepan.
- Continue to cook over medium heat, stirring constantly, until the mixture thickens and begins to bubble.
- Remove from heat and stir in the butter and vanilla extract until fully melted and incorporated.
- Pour the pudding into serving dishes. Cover with plastic wrap directly on the surface to prevent skin from forming.
- Chill for at least 2 hours before serving.
Notes
- For a dairy-free version, substitute milk and butter with plant-based alternatives.
- Add a pinch of cinnamon or nutmeg for a warm twist.
- Layer with cookies or fruit for a fun parfait version.
- Prep Time: 10 minutes
- Cook Time: 10 minutes
- Category: Dessert
- Method: Stovetop
- Cuisine: American
Nutrition
- Serving Size: 1 serving
- Calories: 290
- Sugar: 28g
- Sodium: 180mg
- Fat: 10g
- Saturated Fat: 5g
- Unsaturated Fat: 4g
- Trans Fat: 0g
- Carbohydrates: 42g
- Fiber: 0g
- Protein: 6g
- Cholesterol: 140mg