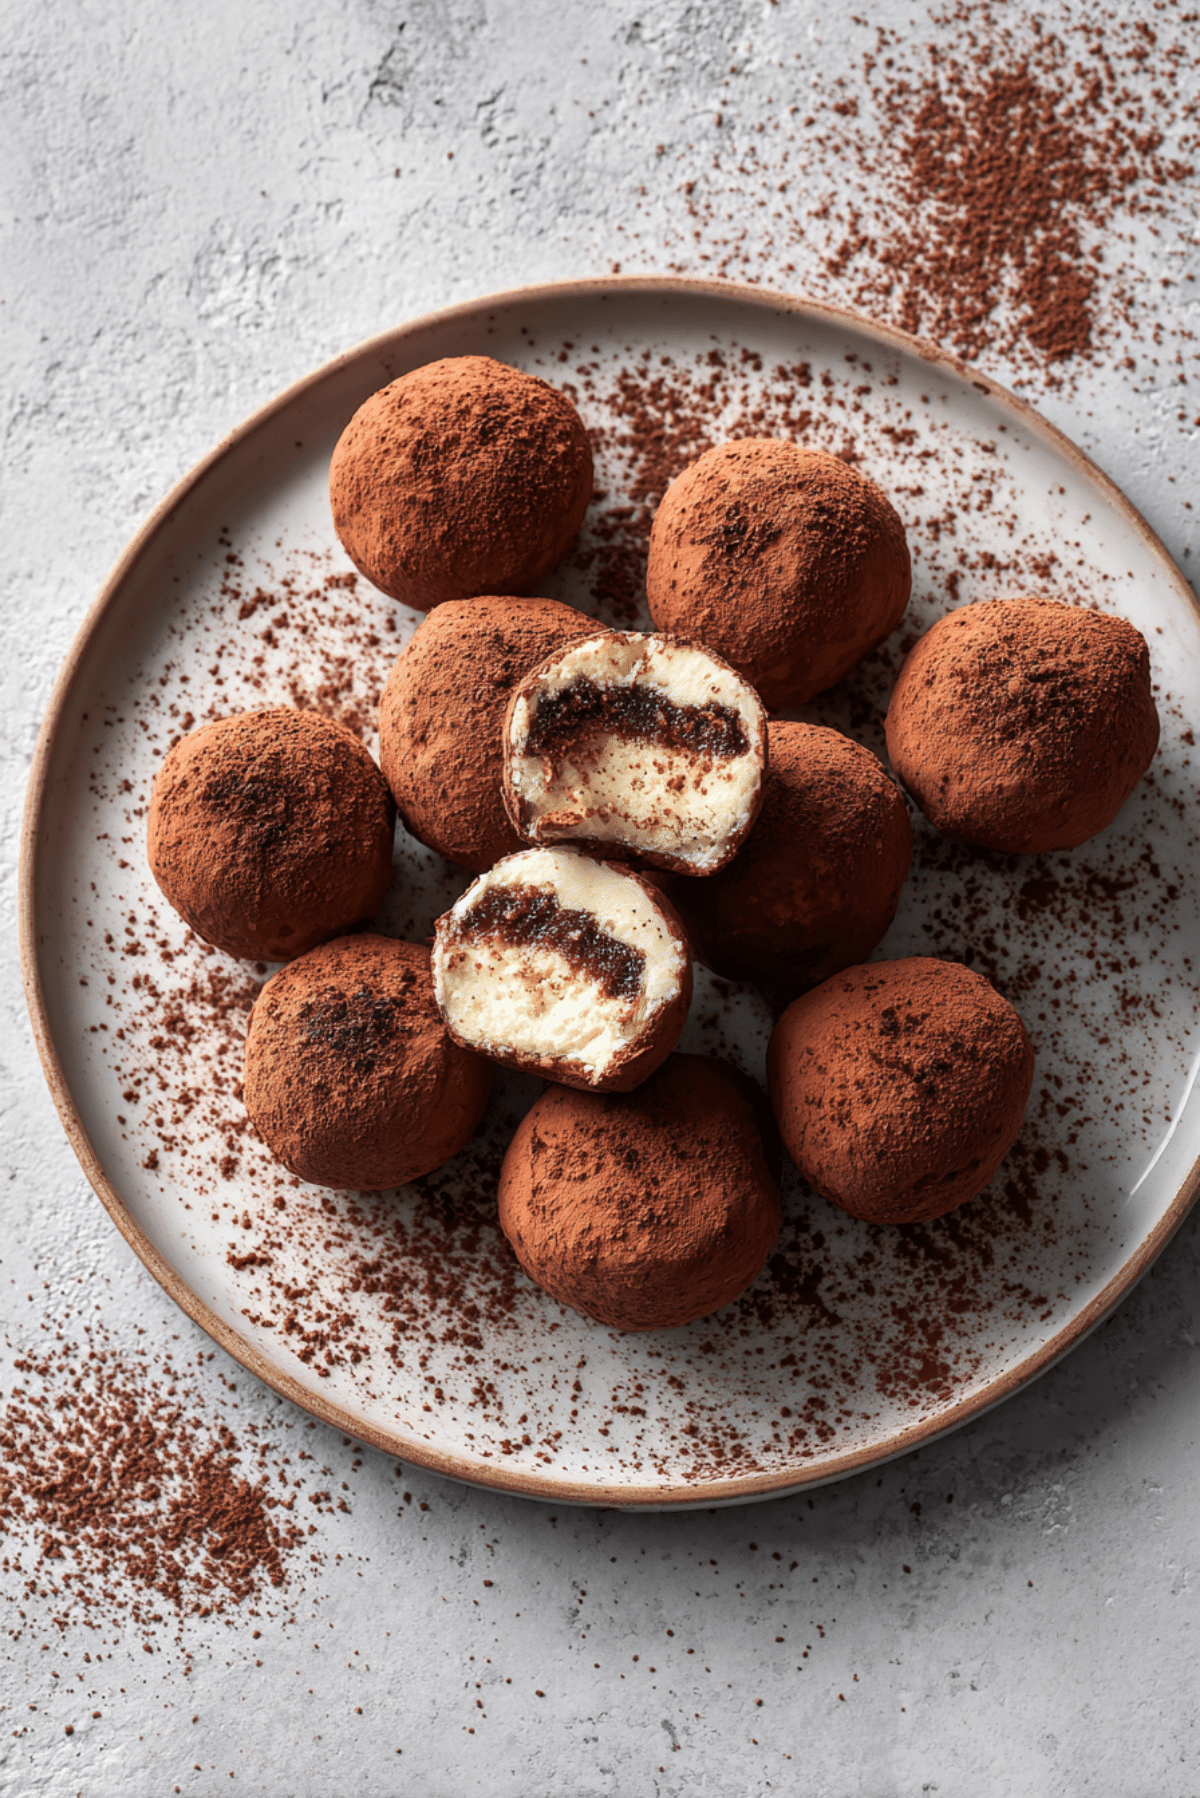
Tiramisu Balls
If you’re craving the creamy charm of tiramisu but want something quicker, easier, and dare I say, more fun to eat—these tiramisu balls are the answer. Imagine a rich, coffee-kissed truffle that melts in your mouth with the sweetness of mascarpone and a hint of chocolate. They’re indulgent, adorable, and perfect for making any moment feel a little more special.
Behind the Recipe
This recipe was born out of a little kitchen experiment on a lazy Sunday afternoon. I had leftover ladyfingers from a previous tiramisu attempt and a craving for something sweet but snackable. One thing led to another, and soon I had a tray of these bite-sized delights chilling in the fridge. They turned out to be a hit with everyone who tried them, and now I make them on repeat for holidays, birthdays, and even casual get-togethers.
Recipe Origin or Trivia
Tiramisu hails from Italy, known for its luxurious layers of coffee-soaked ladyfingers, mascarpone cream, and cocoa powder. The name itself means “pick me up,” and it truly lives up to the title with its energizing coffee flavor. These tiramisu balls are a modern twist on the classic dessert, turning it into a finger-friendly treat that still holds onto that Italian heart and soul.
Why You’ll Love Tiramisu Balls
These little treats pack a punch of flavor and convenience. Here’s why they’ll win your heart:
Versatile: Perfect for parties, lunchboxes, or a quiet dessert moment.
Budget-Friendly: Uses simple, affordable ingredients you might already have.
Quick and Easy: No baking needed, just mix, roll, and chill.
Customizable: Add chocolate chips, chopped nuts, or even a hint of cinnamon.
Crowd-Pleasing: Their rich flavor and cute size make them a universal hit.
Make-Ahead Friendly: Chill them in advance and enjoy when ready.
Great for Leftovers: Leftover ladyfingers or coffee? This is the perfect way to use them up.
Chef’s Pro Tips for Perfect Results
These are simple to make, but a few tricks will take them to the next level:
- Use strong espresso or dark roast coffee for bold flavor.
- Chill the mixture before rolling to make shaping easier.
- Dust with cocoa right before serving to keep it fresh-looking.
- If the mixture feels too wet, add a bit more crushed ladyfingers.
- Store them in an airtight container to maintain texture.
Kitchen Tools You’ll Need
Just a few simple tools and you’re good to go.
Mixing Bowl: For combining all your delicious ingredients.
Food Processor: To finely crush the ladyfingers (or use a rolling pin and zip-top bag).
Spoon or Scoop: Helps in portioning the mixture evenly.
Baking Tray: For chilling the shaped balls.
Sieve: For lightly dusting cocoa powder.
Ingredients in Tiramisu Balls
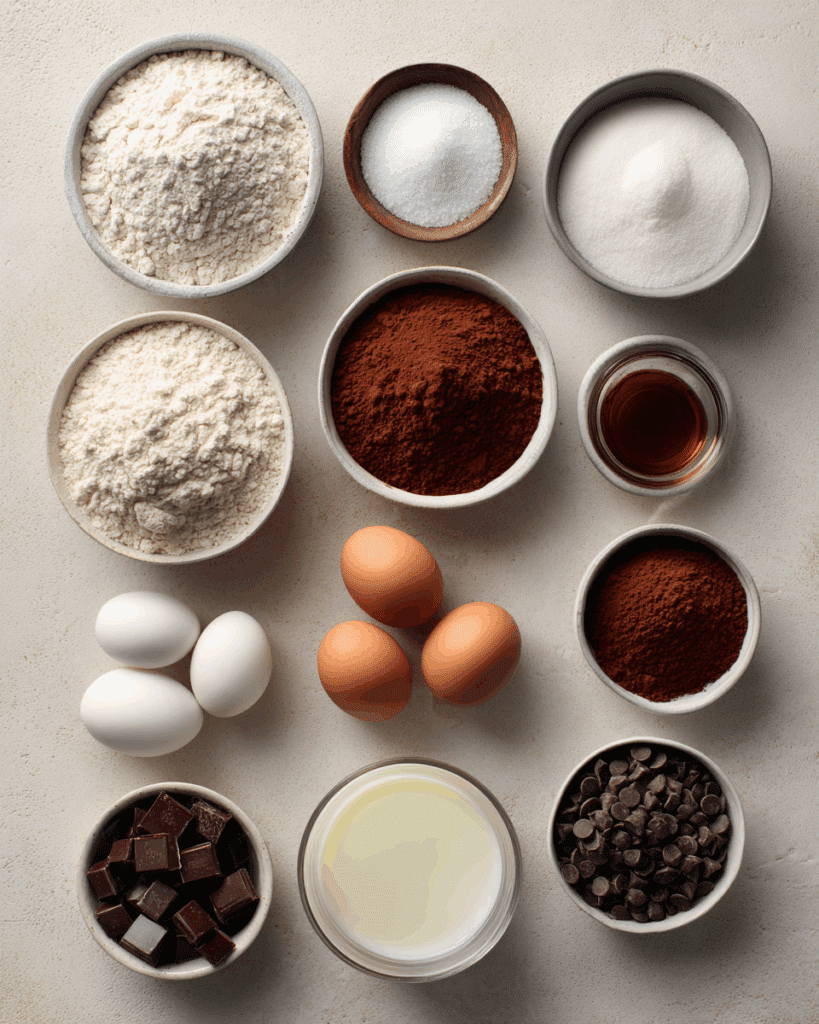
Creating these heavenly bites only takes a handful of ingredients working together in harmony:
- Ladyfingers (Savoiardi): 200g, finely crushed. These create the base structure and that classic tiramisu texture.
- Mascarpone Cheese: 250g. Adds that rich, creamy element essential to tiramisu.
- Espresso or Strong Coffee: 60ml, cooled. Infuses the mixture with deep coffee flavor.
- Powdered Sugar: 50g. Sweetens the mix without grittiness.
- Vanilla Extract: 1 teaspoon. Adds warmth and depth to the flavor.
- Cocoa Powder: For dusting. Brings that signature tiramisu finish.
Ingredient Substitutions
In case you’re missing something, here are easy swaps:
Ladyfingers: Use graham crackers or vanilla wafers.
Mascarpone Cheese: Substitute with cream cheese, but soften it first.
Espresso: Instant coffee mixed strong will work just fine.
Powdered Sugar: Blend granulated sugar in a blender until fine.
Ingredient Spotlight
Mascarpone Cheese: This Italian cream cheese gives tiramisu its creamy, melt-in-your-mouth texture and subtle sweetness.
Espresso: The soul of tiramisu. Its deep bitterness balances the sweetness and brings complexity.
Instructions for Making Tiramisu Balls
Let’s get to the fun part. Here are the steps you’re going to follow:
- Preheat Your Equipment:
No oven here! Just clear out some fridge space and prepare your tray for chilling. - Combine Ingredients:
In a large bowl, mix crushed ladyfingers, mascarpone, powdered sugar, vanilla, and espresso. Stir until well combined and smooth. - Prepare Your Cooking Vessel:
Line a baking tray with parchment paper. - Assemble the Dish:
Scoop out small portions and roll them into balls using your hands. Place each ball on the prepared tray. - Cook to Perfection:
Not cooking exactly, but chill the tray in the refrigerator for at least 1 hour so the balls can firm up. - Finishing Touches:
Once chilled, dust each ball generously with cocoa powder using a sieve. - Serve and Enjoy:
Serve straight from the fridge. Trust me, you’re going to love this.
Texture & Flavor Secrets
These tiramisu balls are all about creamy softness on the inside, contrasted with a slight cocoa bitterness on the outside. The crushed ladyfingers give just enough bite to hold everything together, while the mascarpone keeps it indulgent and velvety.
Cooking Tips & Tricks
A few more tips before you dive in:
- Roll with damp hands to prevent sticking.
- Want extra indulgence? Dip in melted chocolate.
- For a firmer texture, freeze instead of chilling.
What to Avoid
Don’t let a few common mistakes ruin your dessert adventure:
- Too much coffee can make the mix soggy.
- Avoid over-mixing. It can break down the texture.
- Don’t skip the chilling step, or they’ll be too soft to handle.
Nutrition Facts
Servings: 20 balls
Calories per serving: 95
Note: These are approximate values.
Preparation Time
Prep Time: 15 minutes
Cook Time: 0 minutes
Total Time: 1 hour 15 minutes (including chilling)
Make-Ahead and Storage Tips
These tiramisu balls are ideal for prepping ahead. Make them a day in advance and store them in an airtight container in the fridge. They’ll last up to 4 days. You can also freeze them for up to a month—just thaw before serving.
How to Serve Tiramisu Balls
These are elegant enough for a dessert platter and casual enough for a midday treat. Serve them on a pretty tray dusted with extra cocoa, or tuck them into mini cupcake liners for individual servings. Pair with a shot of espresso or a glass of cold milk.
Creative Leftover Transformations
If you’ve got leftovers, try this:
- Crumble over vanilla ice cream.
- Layer into a quick parfait with whipped cream and fruit.
- Dip in melted chocolate for a truffle twist.
Additional Tips
For extra wow:
- Add a hint of orange zest for brightness.
- Mix in mini chocolate chips for added texture.
- Sift cocoa just before serving for a fresh finish.
Make It a Showstopper
Presentation makes the magic. Roll some in crushed chocolate or cocoa nibs for texture. Serve on a marble board with scattered coffee beans and a sprig of mint for color. A little visual flair goes a long way.
Variations to Try
Switch it up with these fun takes:
- Mocha Tiramisu Balls: Add cocoa powder to the mix for a chocolatey twist.
- Coconut-Coated: Roll in desiccated coconut instead of cocoa.
- Nutty Crunch: Mix in finely chopped hazelnuts.
- Spiced: Add a pinch of cinnamon or nutmeg.
- Berry Kissed: Add a few dried cranberries for tartness.
FAQ’s
Q1: Can I make these without coffee?
A1: Yes, you can use milk or a coffee substitute like chicory.
Q2: Are they gluten-free?
A2: Use gluten-free ladyfingers to make them gluten-free.
Q3: How long can I store them?
A3: They last 3–4 days in the fridge or up to a month in the freezer.
Q4: Can I freeze tiramisu balls?
A4: Absolutely. Freeze in an airtight container and thaw before serving.
Q5: Can I use instant coffee?
A5: Yes, just mix it strong and let it cool.
Q6: What if I don’t have mascarpone?
A6: Cream cheese works in a pinch, though the flavor will differ slightly.
Q7: Can I coat them in something else?
A7: Sure! Try powdered sugar, chocolate shavings, or even crushed nuts.
Q8: Are these kid-friendly?
A8: Definitely, just use decaf coffee or milk for a child-safe version.
Q9: Can I double the recipe?
A9: Yes, it scales up perfectly. Just keep the ratios the same.
Q10: Should I serve them cold?
A10: Yes, they’re best served chilled to maintain shape and flavor.
Conclusion
Tiramisu balls are the perfect little indulgence, combining all the beloved flavors of tiramisu in a convenient, no-bake bite. They’re creamy, sweet, just a little bitter from the cocoa, and oh-so-easy to love. Let me tell you, it’s worth every bite. Give them a try, and you might just find your new favorite treat.
Print
Tiramisu Balls
- Total Time: 1 hour 15 minutes
- Yield: 20 balls
- Diet: Vegetarian
Description
These no-bake Tiramisu Balls are a fun, bite-sized twist on the classic Italian dessert. Creamy, coffee-infused, and dusted with cocoa, they’re perfect for parties, gifts, or an indulgent snack.
Ingredients
- Ladyfingers (Savoiardi): 200g, finely crushed
- Mascarpone Cheese: 250g
- Espresso or Strong Coffee: 60ml, cooled
- Powdered Sugar: 50g
- Vanilla Extract: 1 teaspoon
- Cocoa Powder: For dusting
Instructions
- Preheat Your Equipment: Clear fridge space and prepare a tray for chilling.
- Combine Ingredients: In a bowl, mix crushed ladyfingers, mascarpone, sugar, vanilla, and coffee until smooth.
- Prepare Your Cooking Vessel: Line a baking tray with parchment paper.
- Assemble the Dish: Roll the mixture into small balls and place on tray.
- Cook to Perfection: Chill for at least 1 hour.
- Finishing Touches: Dust with cocoa powder using a sieve.
- Serve and Enjoy: Serve chilled and enjoy the creamy treat.
Notes
- Use strong coffee for richer flavor.
- Chill well to maintain shape.
- Dip in chocolate for a decadent variation.
- Roll with damp hands to avoid sticking.
- Prep Time: 15 minutes
- Cook Time: 0 minutes
- Category: Dessert
- Method: No-Bake
- Cuisine: Italian
Nutrition
- Serving Size: 1 ball
- Calories: 95
- Sugar: 6g
- Sodium: 25mg
- Fat: 5g
- Saturated Fat: 3g
- Unsaturated Fat: 2g
- Trans Fat: 0g
- Carbohydrates: 10g
- Fiber: 0g
- Protein: 1g
- Cholesterol: 15mg