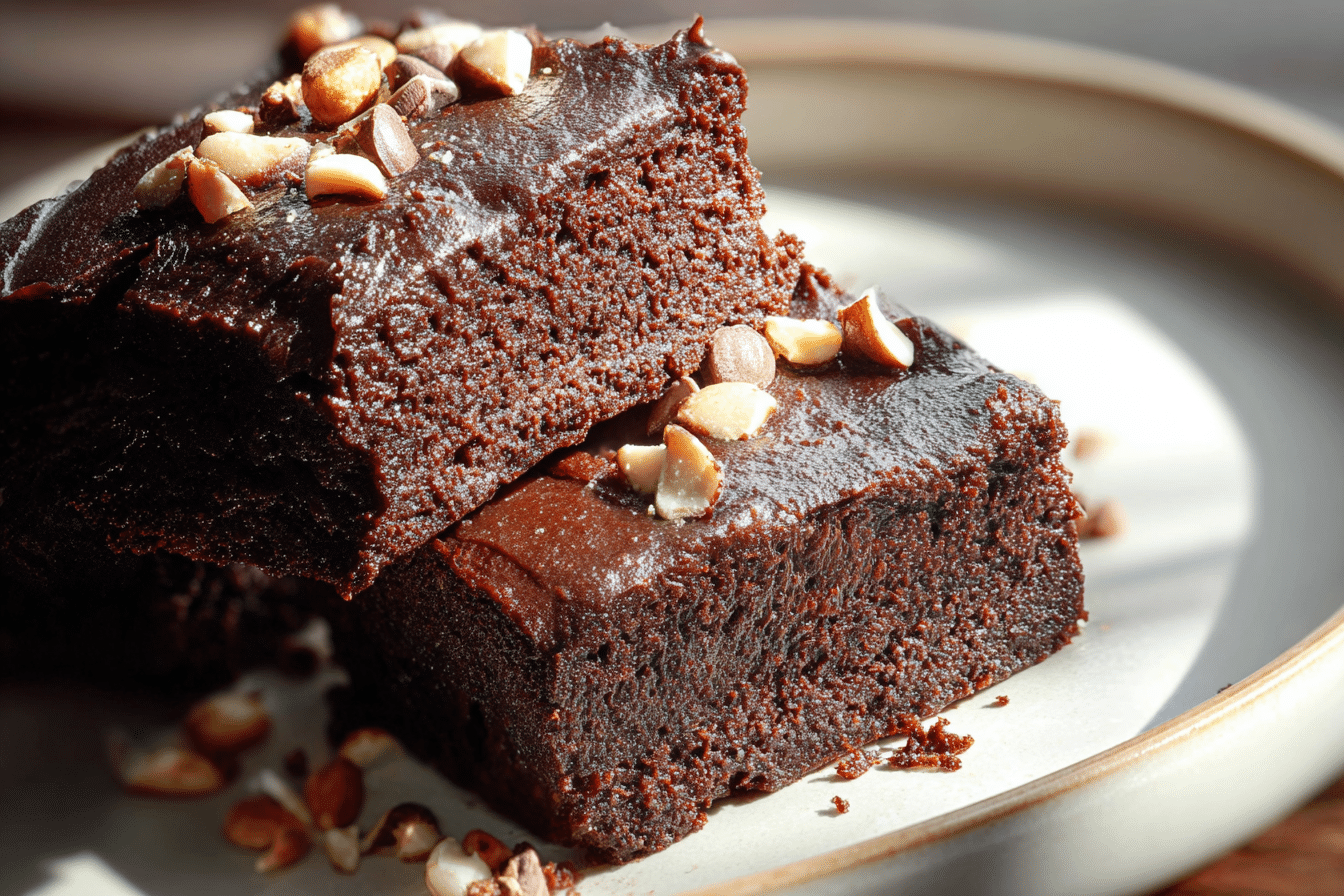
No-Bake Brownie
There’s something undeniably comforting about sinking your teeth into a rich, fudgy brownie — but what if you didn’t even need to turn on the oven? This No-Bake Brownie is everything you crave in a decadent dessert: dense, chocolatey, slightly chewy, and satisfyingly sweet. With just a handful of pantry staples, you can whip up this indulgent treat in no time, perfect for those warm days when baking feels like a chore. Trust me, you’re going to love this.
Behind the Recipe
It all started on a summer afternoon when the craving for brownies struck hard, but the thought of preheating the oven in a sweltering kitchen was enough to make me abandon ship. That’s when the idea was born — a brownie that delivers all the flavor and texture of the baked classic, without the need for heat. What began as a quick fix has since turned into a go-to favorite in my kitchen, especially during holidays and gatherings.
Recipe Origin or Trivia
Brownies have their roots in American cuisine, dating back to the early 20th century. Legend has it that a distracted chef accidentally left out baking powder while trying to make a chocolate cake, resulting in a denser, fudgier creation — and the brownie was born. The no-bake variation takes inspiration from refrigerator bars and raw desserts, where ingredients like nuts and dates are combined to mimic the moist, chewy consistency of baked brownies.
Why You’ll Love No-Bake Brownie
This no-bake version will steal your heart for so many reasons. Here’s why:
Versatile: Make it nutty, fruity, or even minty — this base adapts to endless flavor profiles.
Budget-Friendly: With only a few basic ingredients, this dessert won’t break the bank.
Quick and Easy: No oven, no fuss. Just blend, press, and chill.
Customizable: Swap nuts, sweeteners, or add extras like coconut or espresso powder.
Crowd-Pleasing: Everyone from kids to adults devours these at lightning speed.
Make-Ahead Friendly: Prepare in advance and keep chilled until you’re ready to serve.
Great for Leftovers: Store for days and enjoy whenever the chocolate craving hits.
Chef’s Pro Tips for Perfect Results
To make sure every square of this brownie is luscious and satisfying, here are some insider tricks:
- Use soft, sticky dates: Medjool dates are ideal for the right texture and sweetness.
- Toast your nuts first: A quick toast deepens the flavor and adds warmth.
- Don’t over-blend: Keep a bit of texture for that satisfying brownie chew.
- Line your pan: Parchment paper makes removal a breeze and keeps cleanup minimal.
- Chill well before slicing: This helps the brownies firm up beautifully.
Kitchen Tools You’ll Need
Before diving in, gather these tools for a smooth experience:
Food Processor: Essential for blending the sticky mixture into a fudgy mass.
8×8-inch Baking Dish: The perfect size for thick, satisfying squares.
Parchment Paper: For easy lifting and clean edges.
Measuring Cups & Spoons: Accuracy is key for balanced flavor.
Rubber Spatula: Great for pressing and smoothing the mixture evenly.
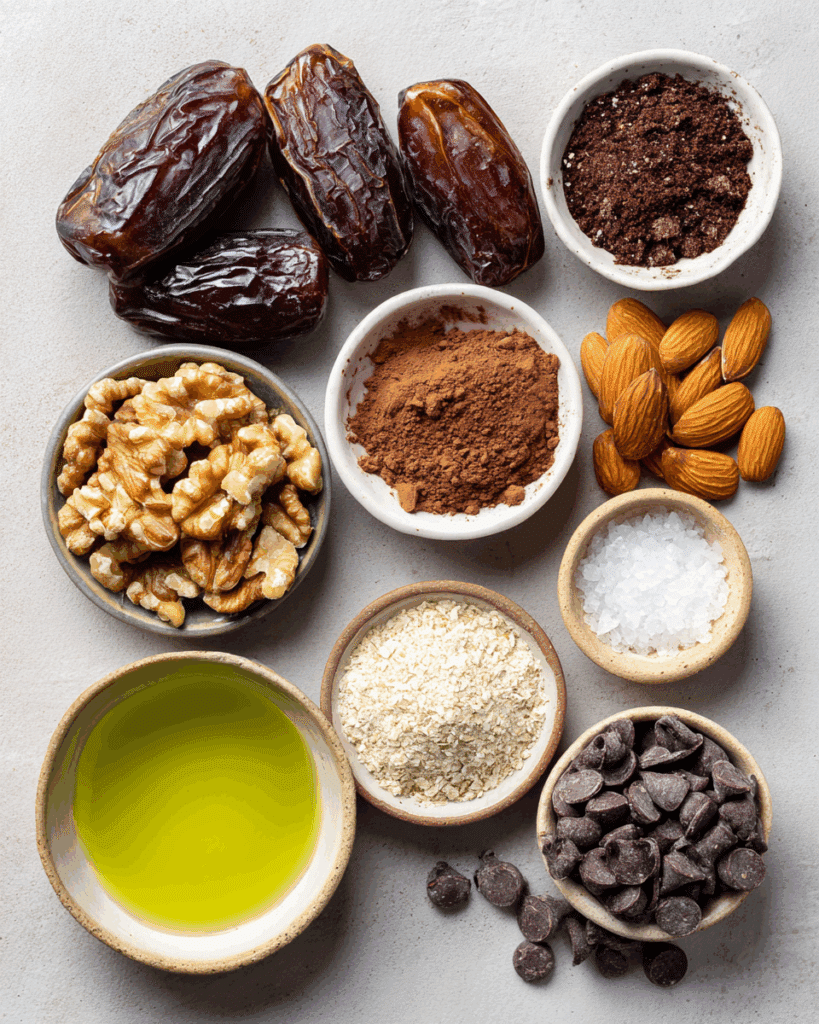
Ingredients in No-Bake Brownie
This treat comes together with simple pantry staples that create magic when combined.
- Medjool Dates: 1 ½ cups (pitted) — naturally sweet and sticky, these bind everything together.
- Raw Walnuts: 1 cup — provide a nutty depth and essential texture.
- Almonds: ½ cup — offer crunch and a toasty, rich base.
- Cocoa Powder: ½ cup — adds that intense, dark chocolate flavor.
- Vanilla Extract: 1 teaspoon — enhances the sweetness and aroma.
- Sea Salt: ¼ teaspoon — balances the flavors and deepens the chocolate.
- Dark Chocolate Chips: ½ cup (melted) — optional, but makes the brownies even more decadent.
Ingredient Substitutions
Don’t worry if you’re missing a few ingredients. Here are some easy swaps:
Medjool Dates: Use dried figs or prunes, but soak them in warm water first.
Raw Walnuts: Swap with pecans or cashews for a different nutty flavor.
Almonds: Try sunflower seeds or pumpkin seeds for a nut-free option.
Cocoa Powder: Unsweetened carob powder works as a milder alternative.
Vanilla Extract: Use almond extract for a twist in flavor.
Dark Chocolate Chips: Swap with dairy-free chocolate or even peanut butter chips.
Ingredient Spotlight
Medjool Dates: These sweet, caramel-like fruits are the backbone of no-bake desserts, offering both stickiness and natural sugar without the need for added sweeteners.
Cocoa Powder: Not only does it bring that classic chocolate punch, but it also contains antioxidants that make you feel just a little better about reaching for a second piece.
Instructions for Making No-Bake Brownie
Ready to bring this irresistible treat to life? Here are the steps you’re going to follow:
- Preheat Your Equipment:
No oven needed here, but if using chocolate chips, melt them gently using a double boiler or microwave. - Combine Ingredients:
In a food processor, blend the walnuts and almonds until crumbly. Add the pitted dates, cocoa powder, vanilla, and salt. Blend until the mixture holds together when pressed. - Prepare Your Cooking Vessel:
Line an 8×8-inch baking dish with parchment paper, allowing some overhang for easy lifting later. - Assemble the Dish:
Transfer the mixture to the dish and press it firmly into an even layer using a spatula or your hands. - Cook to Perfection:
Technically, there’s no cooking, but this step is all about chilling. Place the tray in the refrigerator for at least 1–2 hours until firm. - Finishing Touches:
If desired, drizzle melted chocolate over the top and sprinkle with a pinch of flaky salt or chopped nuts. - Serve and Enjoy:
Once set, lift the slab out using the parchment, cut into squares, and serve chilled or at room temp.
Texture & Flavor Secrets
The beauty of this no-bake brownie lies in its contrast: the smooth richness of cocoa, the sticky chew from dates, and the subtle crunch of nuts. Add a drizzle of melted chocolate and each bite becomes a mosaic of silky, sweet, salty, and nutty notes that melt in your mouth.
Cooking Tips & Tricks
Here’s how to level up your no-bake brownie game:
- Add a tablespoon of espresso powder to enhance the chocolate flavor.
- For a chewier bite, leave a few chunks of dates unblended.
- A pinch of cinnamon or cayenne can add an intriguing warmth.
What to Avoid
Let’s steer clear of a few common missteps:
- Don’t use dry, hard dates — they won’t blend well and the mixture won’t stick.
- Avoid over-processing the nuts into a paste.
- Don’t skip chilling — the brownies need that time to firm up and slice cleanly.
Nutrition Facts
Servings: 16
Calories per serving: 180
Note: These are approximate values.
Preparation Time
Prep Time: 15 minutes
Cook Time: 0 minutes
Total Time: 2 hours (including chilling time)
Make-Ahead and Storage Tips
These brownies are ideal for prepping ahead. Simply cover the tray tightly and store in the fridge for up to one week. You can also freeze them for up to 3 months — just separate layers with parchment paper. Thaw overnight in the fridge or enjoy slightly chilled.
How to Serve No-Bake Brownie
Serve these beauties straight from the fridge on a rustic wooden board, or cut into bite-sized squares and stack them high for a stunning dessert platter. Pair with fresh berries or a scoop of banana nice cream for an elevated treat.
Creative Leftover Transformations
If you somehow have leftovers, here’s what you can do:
- Brownie Bites: Roll into balls and dip in melted chocolate for truffle-style treats.
- Crumb Topping: Crumble over yogurt or smoothie bowls for a crunchy finish.
- Brownie Sundae: Layer with frozen yogurt and chopped fruits for an instant parfait.
Additional Tips
- For an extra glossy top, brush the pressed mixture with a thin layer of melted coconut oil.
- Chill overnight for the deepest flavor development.
- Dust with cocoa powder before serving for a dramatic look.
Make It a Showstopper
Presentation makes all the difference. Use a sharp knife for clean edges, and sprinkle with sea salt, cacao nibs, or crushed freeze-dried berries for color and crunch. Serve on a dark slate for maximum visual contrast.
Variations to Try
- Mint Chocolate Brownies: Add peppermint extract and top with cacao nibs.
- Peanut Butter Swirl: Swirl in a few tablespoons of natural peanut butter before pressing into the pan.
- Coconut Crunch: Fold in shredded coconut and top with toasted flakes.
- Hazelnut Dream: Use roasted hazelnuts and a dash of hazelnut extract.
- Spicy Mexican Brownie: Add cinnamon and a hint of chili powder for a bold twist.
FAQ’s
Q1: Can I make this without a food processor?
A1: Yes, though it’ll require more effort. Use a blender or chop everything finely and mix by hand.
Q2: How long can I store these brownies?
A2: Up to one week in the fridge or 3 months in the freezer.
Q3: Are these gluten-free?
A3: Yes, all ingredients are naturally gluten-free.
Q4: Can I use cacao powder instead of cocoa powder?
A4: Absolutely, just note cacao is slightly more bitter and nutrient-dense.
Q5: What’s the best way to melt chocolate chips?
A5: Use a microwave in 20-second bursts or a double boiler on low heat.
Q6: Do I need to toast the nuts?
A6: It’s optional but adds depth and warmth to the flavor.
Q7: Can I add protein powder?
A7: Yes, add a scoop during blending, but you may need extra dates for binding.
Q8: Are these brownies kid-friendly?
A8: Definitely, just skip the espresso or chili if making for little ones.
Q9: What can I use instead of parchment paper?
A9: Plastic wrap or a silicone mat can work in a pinch.
Q10: Can I add other toppings?
A10: Go wild — try mini chocolate chips, coconut flakes, or chopped dried fruits.
Conclusion
Whether you’re dodging the summer heat, need a last-minute treat, or just love a quick fix with big chocolate payoff, these No-Bake Brownies are here to rescue your dessert dreams. Rich, fudgy, and utterly irresistible, they’ll become a staple in your sweet rotation. Let me tell you, it’s worth every bite.
Print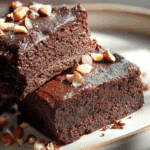
No-Bake Brownie
- Total Time: 2 hours
- Yield: 16 brownies
- Diet: Vegan
Description
Decadent, chewy, and ultra-chocolatey, these No-Bake Brownies are a quick and easy dessert made with wholesome ingredients—perfect for satisfying sweet cravings without turning on the oven.
Ingredients
- Medjool Dates: 1 ½ cups (pitted) – naturally sweet and sticky, these bind everything together.
- Raw Walnuts: 1 cup – provide a nutty depth and essential texture.
- Almonds: ½ cup – offer crunch and a toasty, rich base.
- Cocoa Powder: ½ cup – adds that intense, dark chocolate flavor.
- Vanilla Extract: 1 teaspoon – enhances the sweetness and aroma.
- Sea Salt: ¼ teaspoon – balances the flavors and deepens the chocolate.
- Dark Chocolate Chips: ½ cup (melted, optional) – makes the brownies even more decadent.
Instructions
- Preheat Your Equipment: No oven needed, but melt the chocolate chips if using, using a microwave or double boiler.
- Combine Ingredients: In a food processor, blend walnuts and almonds until crumbly. Add dates, cocoa powder, vanilla, and salt. Blend until mixture holds together.
- Prepare Your Cooking Vessel: Line an 8×8-inch baking dish with parchment paper for easy removal.
- Assemble the Dish: Press the mixture into the dish in an even layer using a spatula or your hands.
- Cook to Perfection: Chill in the fridge for 1–2 hours until firm.
- Finishing Touches: Drizzle with melted chocolate and sprinkle with flaky salt or chopped nuts if desired.
- Serve and Enjoy: Slice into squares and serve chilled or at room temperature.
Notes
- Use soft Medjool dates for best binding and texture.
- Toast nuts for deeper flavor.
- Customize with flavors like espresso, peppermint, or coconut.
- Store in the fridge for up to 1 week or freeze for 3 months.
- Prep Time: 15 minutes
- Cook Time: 0 minutes
- Category: Dessert
- Method: No-Bake
- Cuisine: American
Nutrition
- Serving Size: 1 brownie
- Calories: 180
- Sugar: 16g
- Sodium: 30mg
- Fat: 11g
- Saturated Fat: 2g
- Unsaturated Fat: 8g
- Trans Fat: 0g
- Carbohydrates: 22g
- Fiber: 4g
- Protein: 3g
- Cholesterol: 0mg