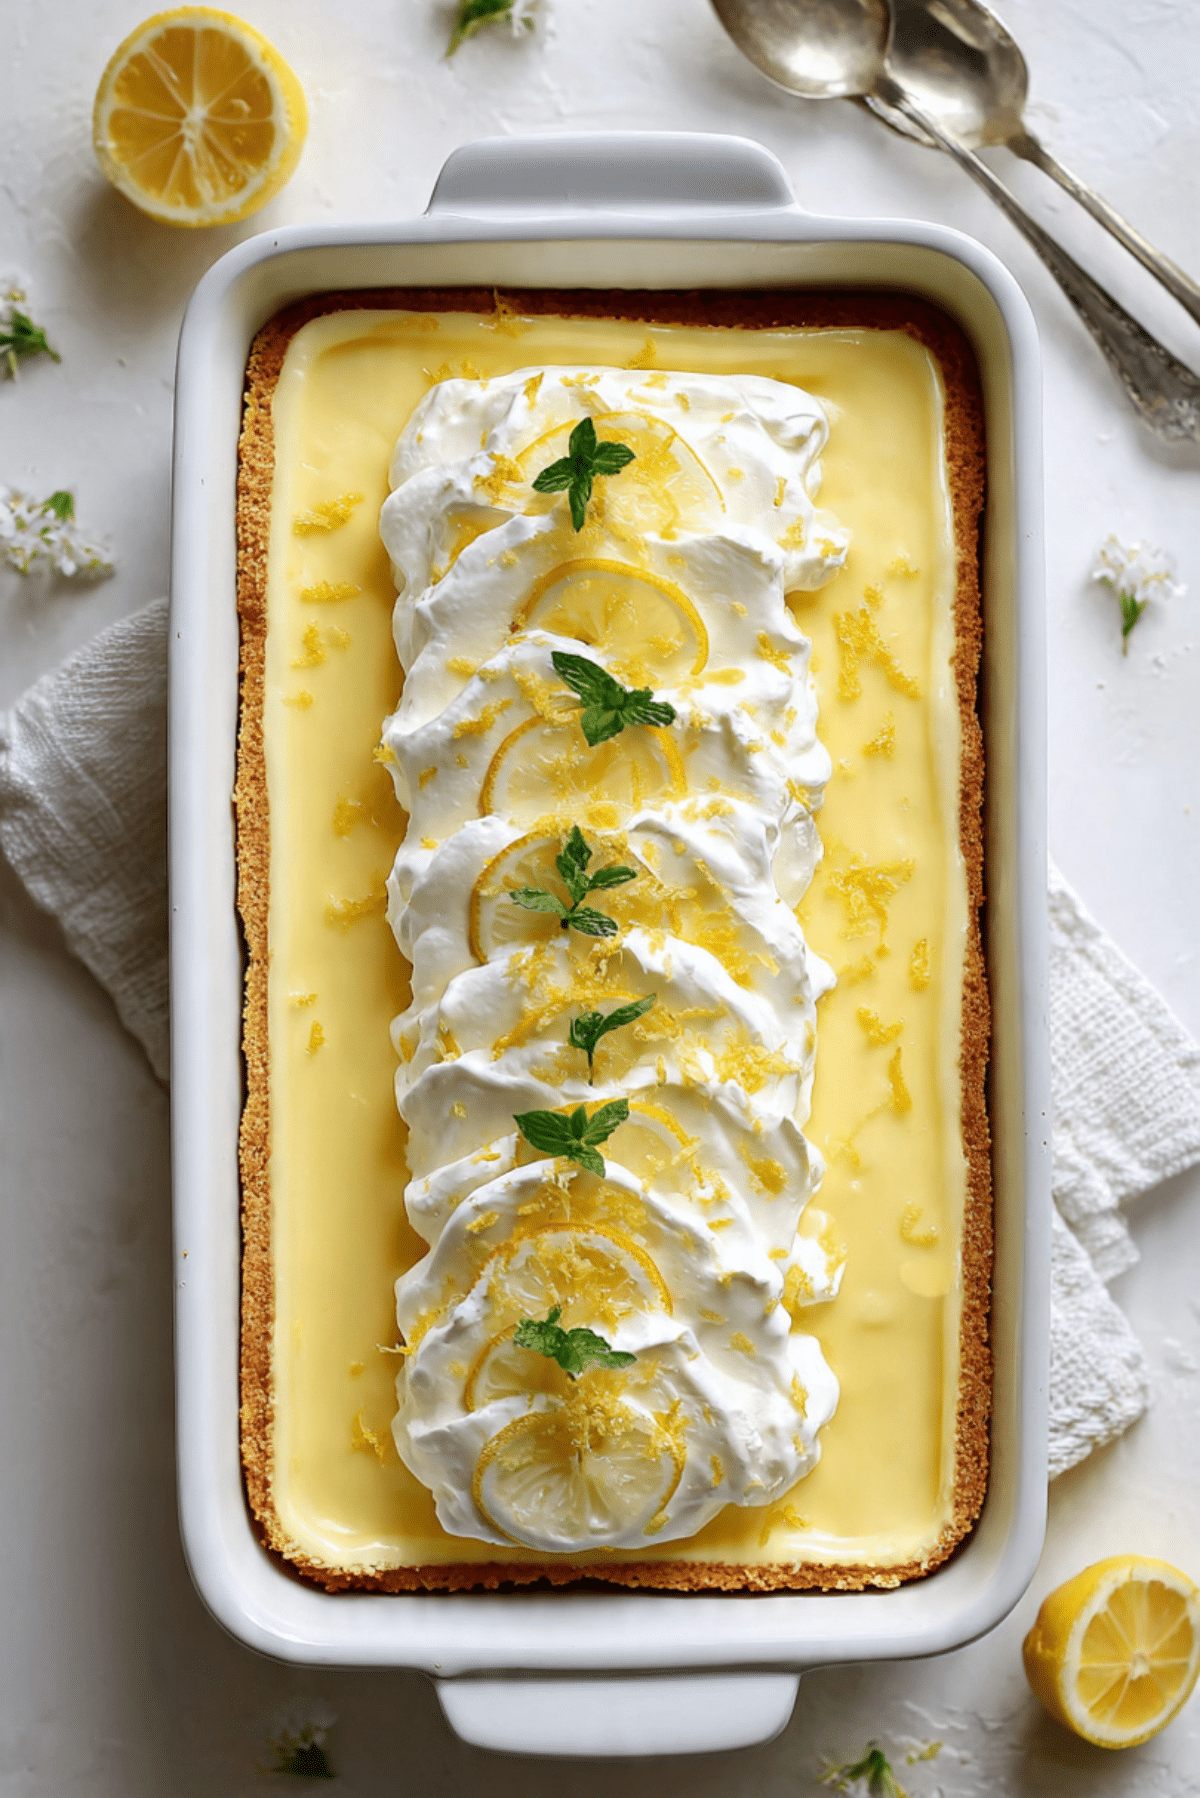
Lemon Lush
There is something about a chilled lemon dessert that instantly makes the whole table feel brighter. The first bite is cool, creamy, sweet, and just tangy enough to wake everything up, and that buttery cookie crust underneath brings the kind of contrast that keeps you going back for one more forkful. Trust me, you’re going to love this, because it feels a little nostalgic, a little fancy, and completely comforting all at once.
A Creamy Citrus Dessert That Always Steals the Show
Some desserts are loud and rich, and then there are desserts like this one, which win people over in a quieter way. This is the kind of treat that slips into a family gathering, a spring brunch, or a summer potluck and somehow becomes the first empty pan on the table.
What makes it so special is the balance. You get that lightly crisp cookie base, then a soft cream cheese layer, followed by a bright lemon pudding layer that tastes sunny and fresh, and finally a cloud of whipped topping that ties everything together. Every spoonful has a little contrast, which makes it feel light even though it is undeniably indulgent. Let me tell you, it’s worth every bite.
The Sweet Story Behind Layered Lush Desserts
And now that the flavor has had its moment, it is worth talking about where desserts like this come from. Layered lush desserts became especially popular in American home kitchens because they were practical, pretty, and easy to make ahead. They often showed up at church suppers, family reunions, and holiday tables, especially when home cooks wanted something that looked impressive without needing complicated pastry work.
The beauty of a dessert like this is that it carries that old-school comfort. It belongs to the same family as layered pudding desserts and icebox-style sweets that rely on the magic of texture, chill time, and simple ingredients. Lemon gives this version a fresh, cheerful personality, and that is exactly why it still feels timeless today.
Why This Recipe Earns a Permanent Spot in Your Dessert Rotation
Before we get into the details, here is why this one works so well and why home bakers keep coming back to it.
Versatile: It fits just about anywhere, from Easter lunch to a casual weekend dinner. It feels refreshing in warm weather, but it is cozy enough to enjoy any time of year.
Budget-Friendly: The ingredient list is simple and familiar, which means you can make something impressive without spending a lot. Most of the magic comes from basic pantry and fridge staples.
Quick and Easy: The steps are very manageable, and the oven only does a small part of the work. Once the crust is baked, the rest comes together with mixing, layering, and chilling.
Customizable: You can make the citrus flavor softer or bolder depending on your taste. A little extra zest on top changes the whole mood in the best way.
Crowd-Pleasing: This one’s a total game-changer when you need a dessert that appeals to almost everyone. It is creamy, bright, and familiar, which makes it easy to love.
Make-Ahead Friendly: In fact, it is better when made ahead. The chill time helps the layers settle and gives you a neater, prettier slice.
Great for Leftovers: A leftover square straight from the fridge the next day might be even better than the first serving. The flavors settle in and the texture gets beautifully firm.
Smart Secrets for a Smoother, Cleaner Layered Dessert
Now let’s dive into a few little tricks that make the final result look polished and taste even better.
- Cool the crust completely: A warm crust can soften the cream cheese layer too quickly, which makes spreading messy and uneven.
- Soften the cream cheese fully: This helps it whip up smooth without tiny lumps. A silky layer makes all the difference here.
- Whisk the pudding until just thickened: You want it spreadable, not overly set, so it settles neatly over the cream cheese layer.
- Chill between major steps if needed: If your kitchen is warm, a short chill after the cream cheese layer can make assembly much easier.
- Slice with a clean knife: Wipe the knife between cuts for those pretty layered squares that make the whole dessert feel bakery-worthy.
Kitchen Tools That Make the Process Easy
By this point, you can probably picture the layers already, so let’s make sure you have the right tools to bring them together without stress.
9×13-inch baking dish: This gives the dessert its classic shape and enough room for clean, even layers.
Mixing bowls: You will want separate bowls for the crust, cream cheese layer, and pudding layer to keep everything organized.
Hand mixer: This makes the cream cheese mixture extra smooth and fluffy with very little effort.
Rubber spatula: Perfect for folding, scraping, and spreading each layer evenly right to the corners.
Whisk: Essential for blending the pudding mix and milk until smooth and creamy.
Measuring cups and spoons: Helpful for keeping the ingredient balance exact, especially in a layered dessert like this.
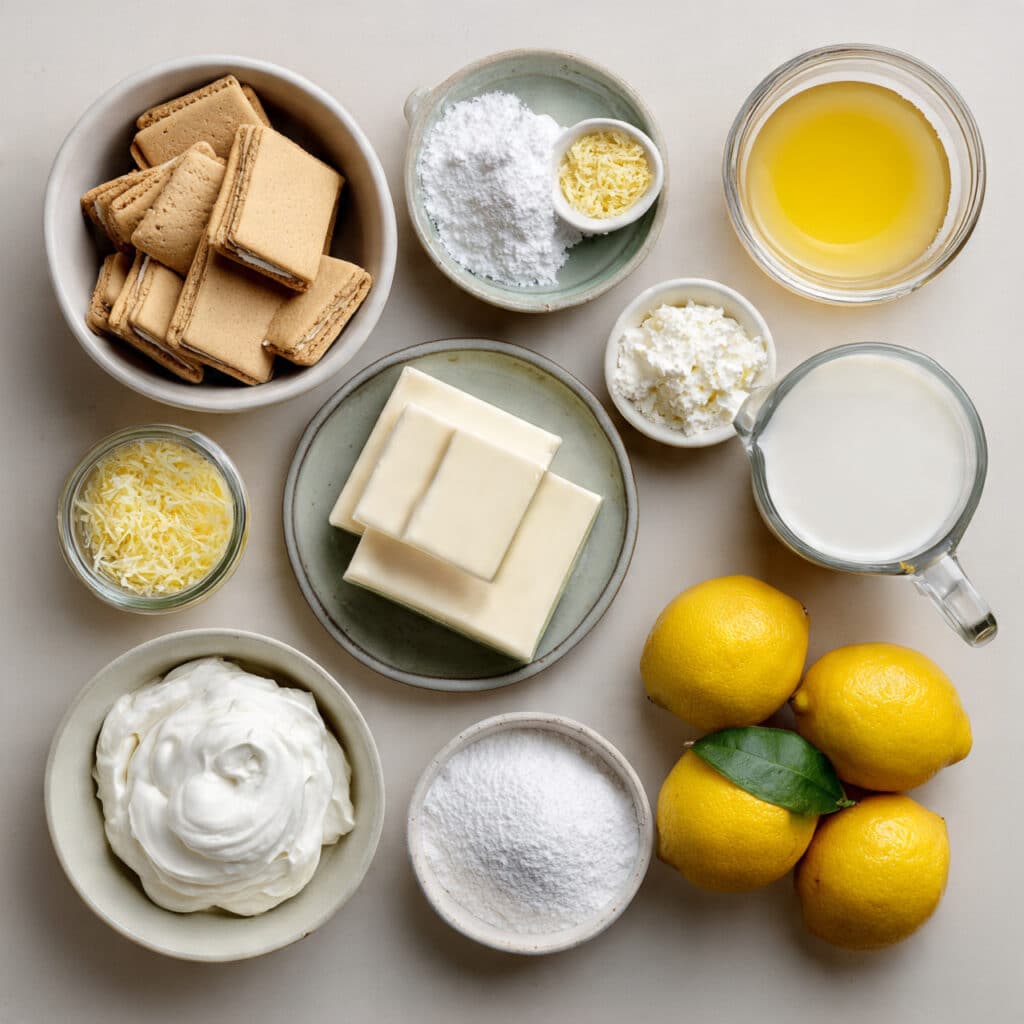
Everything That Goes Into This Bright and Creamy Favorite
This dessert works because each ingredient has a very clear job. Nothing feels random here. The crust brings warmth and crunch, the filling adds richness, the lemon layer wakes everything up, and the topping gives it that soft finish that makes each bite feel complete.
- Vanilla sandwich cookies: 2 cups crushed, these create a sweet, buttery crust with just enough texture to support the creamy layers above.
- Unsalted butter: 1/2 cup, melted, this binds the cookie crumbs together so the crust bakes up firm and sliceable.
- Cream cheese: 8 ounces, softened, this makes the first creamy layer rich, tangy, and velvety.
- Powdered sugar: 1 cup, this sweetens the cream cheese layer while keeping it smooth and light.
- Whipped topping: 3 cups, divided, 1 cup is folded into the cream cheese layer for fluffiness and 2 cups finish the top with a soft, airy layer.
- Instant lemon pudding mix: 2 boxes, 3.4 ounces each, this gives the dessert its sunny color and bold lemon flavor.
- Cold milk: 3 cups, this transforms the pudding mix into a smooth, spoonable layer.
- Lemon zest: 2 tablespoons, divided, 1 tablespoon is mixed into the pudding layer for fresh citrus aroma and 1 tablespoon is sprinkled on top for a bright finishing touch.
Easy Swaps That Still Keep the Dessert Delicious
And because a good home recipe should have a little flexibility, here are a few easy substitutions that still keep the spirit of the dessert intact.
Vanilla sandwich cookies: Graham crackers or vanilla wafer crumbs.
Unsalted butter: Salted butter, just skip any extra salt elsewhere.
Cream cheese: Neufchâtel cheese for a slightly lighter texture.
Powdered sugar: Fine confectioners’ sugar alternative if that is what you have on hand.
Whipped topping: Stabilized homemade whipped cream.
Instant lemon pudding mix: Instant vanilla pudding plus extra lemon zest, though the lemon flavor will be milder.
Cold milk: Whole milk for a richer finish or 2 percent milk for a slightly lighter layer.
Lemon zest: Finely grated lime zest for a different citrus twist.
The Ingredients That Truly Make It Shine
Some ingredients do more than just fill a layer, they define the whole personality of the dessert.
Cream cheese: This is what gives the middle layer that cheesecake-like richness. It adds body, tang, and just enough structure so the dessert tastes luxurious without feeling too heavy.
Lemon zest: This is the little detail that makes everything taste fresher. It sharpens the citrus flavor, lifts the sweetness, and gives the top of the dessert that pretty pop of color.
Let’s Build These Dreamy Layers Together
This is where the fun really starts. Once the ingredients are ready, the whole dessert begins to come together in soft, sunny layers that already look inviting before they even hit the fridge.
- Preheat Your Equipment: Preheat the oven to 350°F. Lightly grease a 9×13-inch baking dish or line it if you want easier lifting and slicing later.
- Combine Ingredients: In a medium bowl, stir together the 2 cups crushed vanilla sandwich cookies and 1/2 cup melted unsalted butter until the crumbs are evenly coated and look like damp sand.
- Prepare Your Cooking Vessel: Press the crumb mixture firmly into the bottom of the prepared baking dish in an even layer. Bake for 10 minutes, then remove it from the oven and let it cool completely.
- Assemble the Dish: In a large bowl, beat the 8 ounces softened cream cheese with 1 cup powdered sugar until smooth. Fold in 1 cup whipped topping until light and fluffy, then spread this mixture evenly over the cooled crust. In another bowl, whisk together the 2 boxes instant lemon pudding mix, 3 cups cold milk, and 1 tablespoon lemon zest until smooth and slightly thickened. Spread the pudding mixture gently over the cream cheese layer.
- Cook to Perfection: There is no additional baking needed here, which is part of the charm. Instead, transfer the dish to the refrigerator and chill for at least 4 hours, or until the layers are fully set and easy to slice.
- Finishing Touches: Spread the remaining 2 cups whipped topping over the chilled pudding layer. Sprinkle the remaining 1 tablespoon lemon zest evenly over the top for a bright, fresh finish.
- Serve and Enjoy: Slice into squares and serve cold. Each piece should hold its shape beautifully, with clear layers and a creamy, refreshing bite.
Why the Texture and Flavor Work So Beautifully
By the time the dessert is chilled and ready, all the layers start doing their own little part in the background. The crust firms up and gives you that subtle crispness at the base. The cream cheese layer turns smooth and mellow, almost like a light cheesecake filling. Then the lemon pudding comes in with a silkier texture and a brighter flavor, which keeps the whole thing from feeling too rich.
That contrast is really the secret here. Sweetness, tang, creaminess, and a bit of structure all show up in the same bite. The lemon zest on top sharpens everything at the very end, so the finish tastes fresh and lively instead of overly sweet.
Handy Tips for the Best Results Every Time
Before you head into your own kitchen adventure, here are a few practical tips that can make the process even smoother.
- Use cold milk for the pudding: This helps it thicken properly and gives you a cleaner layer.
- Spread gently: A soft spatula and light pressure keep the lower layers from mixing into each other.
- Chill long enough: Four hours is the minimum, but overnight gives the neatest slices.
- Zest the lemon right before using it: The aroma is brighter and fresher that way.
Common Mistakes and How to Dodge Them
Even an easy dessert has a few little pitfalls, so here are the ones to watch for.
- Rushing the cooling time: If the crust is still warm, the cream cheese layer can slide and soften too much. Let it cool completely first.
- Using cream cheese that is too cold: This can leave lumps in the filling. Let it soften at room temperature before mixing.
- Overthickening the pudding before spreading: If it sits too long, it can become harder to spread smoothly. Mix it and use it promptly.
- Cutting too early: If the dessert has not chilled long enough, the slices will look messy. A fully chilled pan is much easier to portion.
A Quick Look at the Nutrition Facts
Of course, this is a treat, and a very good one at that. Here is a practical estimate so you know what to expect when planning servings.
Servings: 12
Calories per serving: 320
Note: These are approximate values.
Time Breakdown So You Can Plan Ahead
One of the nicest things about this dessert is how manageable the timing feels. Most of the effort is front-loaded, and then the fridge takes over.
Prep Time: 25 minutes
Cook Time: 10 minutes
Total Time: 4 hours 35 minutes
Make-Ahead Magic and Smart Storage Advice
And now let’s talk about one of this dessert’s biggest strengths, which is how beautifully it fits into a busy schedule. You can make the whole pan the night before and let it chill overnight, which actually improves the texture and makes serving easier the next day.
For storage, cover the dish tightly and keep it in the refrigerator for up to 4 days. The layers stay creamy and the flavor stays bright. Freezing is possible too, though the texture may soften a bit once thawed. If you do freeze it, wrap it well and thaw in the fridge before serving. Reheating is not needed here, since this dessert is meant to be enjoyed cold and refreshing.
My Favorite Ways to Serve It
Once the pan is chilled and the top looks all soft and pretty, serving becomes the easiest part. A square on its own is already lovely, but you can make it feel even more special with a few simple touches.
Serve it straight from the fridge for the cleanest slice and the best texture. Add a tiny extra pinch of lemon zest on each piece if you want a brighter finish. It also pairs really well with hot coffee, iced tea, or a simple berry platter if you are setting out a dessert spread.
Fun Ways to Reinvent the Leftovers
If you happen to have leftovers, and that is never guaranteed, they can still feel fresh and exciting the next day.
You can spoon a square into a dessert glass and layer it with fresh berries for a quick trifle-style treat. You can also freeze small portions for a colder, almost icebox-style dessert. Another fun option is to crumble a leftover square into small cups and top with a little extra whipped topping for an easy mini parfait.
A Few Extra Tips That Make It Even Better
Sometimes it is the little details that turn a good dessert into a great one. Keep the layers even, take your time spreading, and do not underestimate the power of chill time. This one rewards patience in the nicest possible way.
For the cleanest presentation, slice with a sharp knife dipped in warm water and wiped dry between cuts. For the freshest flavor, use finely grated zest and avoid the bitter white pith underneath the peel. And if you are serving guests, make it a little ahead so you can enjoy the moment instead of assembling at the last minute.
Simple Ways to Make It Look Party-Ready
This dessert already has beautiful layers, so it does not need much help to look impressive. A smooth top layer and a fresh sprinkle of lemon zest go a long way. You can also add very thin curls of zest across the top for a soft, elegant finish.
Serve the squares on white plates or a simple platter so the pale yellow layers stand out. That contrast makes the whole dessert feel brighter and more polished. This one’s a total game-changer when you want something easy that still looks celebration-worthy.
Tasty Variations Worth Trying
Once you make the original version, it is very easy to imagine a few spins that keep the same dreamy layered idea.
Berry Lemon Version: Add a thin layer of fresh blueberries or raspberries between the lemon pudding and top whipped layer for a juicy pop.
Coconut Citrus Version: Stir a little toasted coconut into the crust and sprinkle a bit on top for extra texture and a tropical feel.
Lime Twist: Swap the lemon pudding mix for lime if you want a tarter, punchier citrus profile.
Vanilla Lemon Blend: Use one box lemon pudding mix and one box vanilla pudding mix for a softer citrus flavor.
Extra Tangy Style: Increase the zest slightly for a sharper, more fragrant finish that leans brighter and less sweet.
FAQ’s
1. Can I make this dessert a day in advance?
Yes, and it is actually one of the best ways to make it. An overnight chill gives the layers more time to set and makes slicing much easier.
2. Can I use homemade whipped cream instead of whipped topping?
Yes, as long as it is whipped to a stable consistency. A stabilized whipped cream works best so the layers hold up nicely.
3. What kind of cookies work best for the crust?
Vanilla sandwich cookies are great because they give sweetness and structure. Graham crackers or vanilla wafers also work well.
4. Does the crust have to be baked?
A short bake helps the crust firm up and gives it a better texture. It also makes the slices hold together more neatly.
5. Can I use fresh lemon juice instead of pudding mix?
Not for the same result. The pudding mix gives both flavor and structure, while fresh juice alone would not set the layer properly.
6. How long does it need to chill before serving?
At least 4 hours. Overnight is even better if you want very clean slices and a fully set center.
7. Can I freeze it?
Yes, though the texture may be a bit softer after thawing. Freeze tightly covered and thaw in the fridge before serving.
8. Why is my cream cheese layer lumpy?
That usually happens when the cream cheese is too cold. Let it soften fully before mixing for the smoothest texture.
9. Can I add fruit on top?
Absolutely. Fresh berries work especially well and look beautiful against the pale yellow topping.
10. Is this dessert very sweet?
It is sweet, but the lemon flavor helps balance it. The tang from the cream cheese and zest keeps it from feeling too heavy.
Conclusion
By the end of it all, this is the kind of dessert that feels both easy and memorable, which is a rare and wonderful combination. It is cool, creamy, bright, and just rich enough to feel like a real treat without becoming overwhelming. Whether you are making it for a holiday table, a warm-weather gathering, or just because you want something cheerful in the fridge, this one brings a lot of joy for very little fuss. Trust me, once you serve it cold and see those soft lemony layers on the plate, you will understand exactly why people come back to it again and again.
Print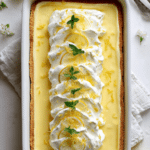
Lemon Lush
- Total Time: 4 hours 35 minutes
- Yield: 12 servings
- Diet: Vegetarian
Description
A chilled layered lemon dessert with a buttery vanilla cookie crust, a smooth cream cheese filling, a bright lemon pudding layer, and a fluffy whipped topping finish. It is creamy, refreshing, and perfect for make-ahead gatherings.
Ingredients
- 2 cups crushed vanilla sandwich cookies
- 1/2 cup unsalted butter, melted
- 8 ounces cream cheese, softened
- 1 cup powdered sugar
- 3 cups whipped topping, divided
- 2 boxes (3.4 ounces each) instant lemon pudding mix
- 3 cups cold milk
- 2 tablespoons lemon zest, divided
Instructions
- Preheat the oven to 350°F and lightly grease a 9×13-inch baking dish.
- In a medium bowl, mix the crushed vanilla sandwich cookies with the melted butter until evenly combined.
- Press the crumb mixture firmly into the bottom of the prepared baking dish. Bake for 10 minutes, then let the crust cool completely.
- In a large bowl, beat the softened cream cheese with the powdered sugar until smooth. Fold in 1 cup of the whipped topping, then spread the mixture evenly over the cooled crust.
- In another bowl, whisk together the instant lemon pudding mix, cold milk, and 1 tablespoon of lemon zest until smooth and slightly thickened. Spread over the cream cheese layer.
- Refrigerate for at least 4 hours, or until the layers are set.
- Spread the remaining 2 cups whipped topping over the pudding layer and sprinkle with the remaining 1 tablespoon lemon zest.
- Slice into 12 squares and serve chilled.
Notes
- Let the crust cool fully before adding the cream cheese layer for cleaner layers.
- Use softened cream cheese to avoid lumps.
- For the neatest slices, chill overnight and wipe the knife clean between cuts.
- Store covered in the refrigerator for up to 4 days.
- Prep Time: 25 minutes
- Cook Time: 10 minutes
- Category: Dessert
- Method: Baked crust, chilled layered dessert
- Cuisine: American
Nutrition
- Serving Size: 1 square
- Calories: 320
- Sugar: 24g
- Sodium: 340mg
- Fat: 18g
- Saturated Fat: 10g
- Unsaturated Fat: 6g
- Trans Fat: 0g
- Carbohydrates: 37g
- Fiber: 1g
- Protein: 4g
- Cholesterol: 35mg