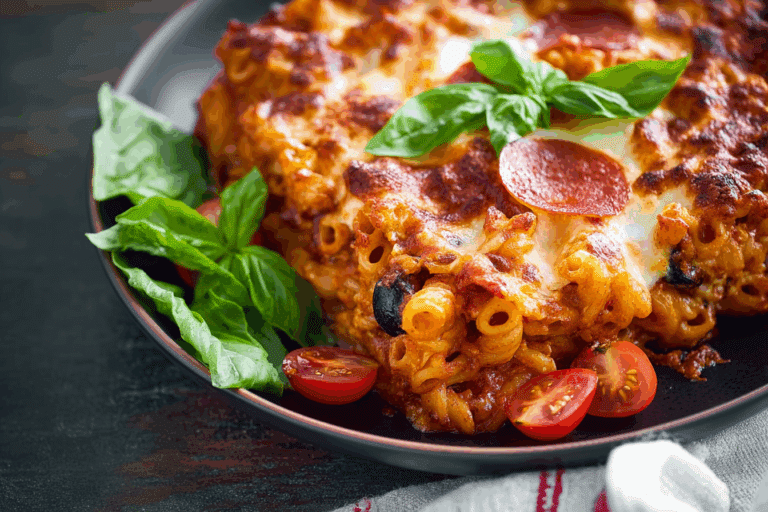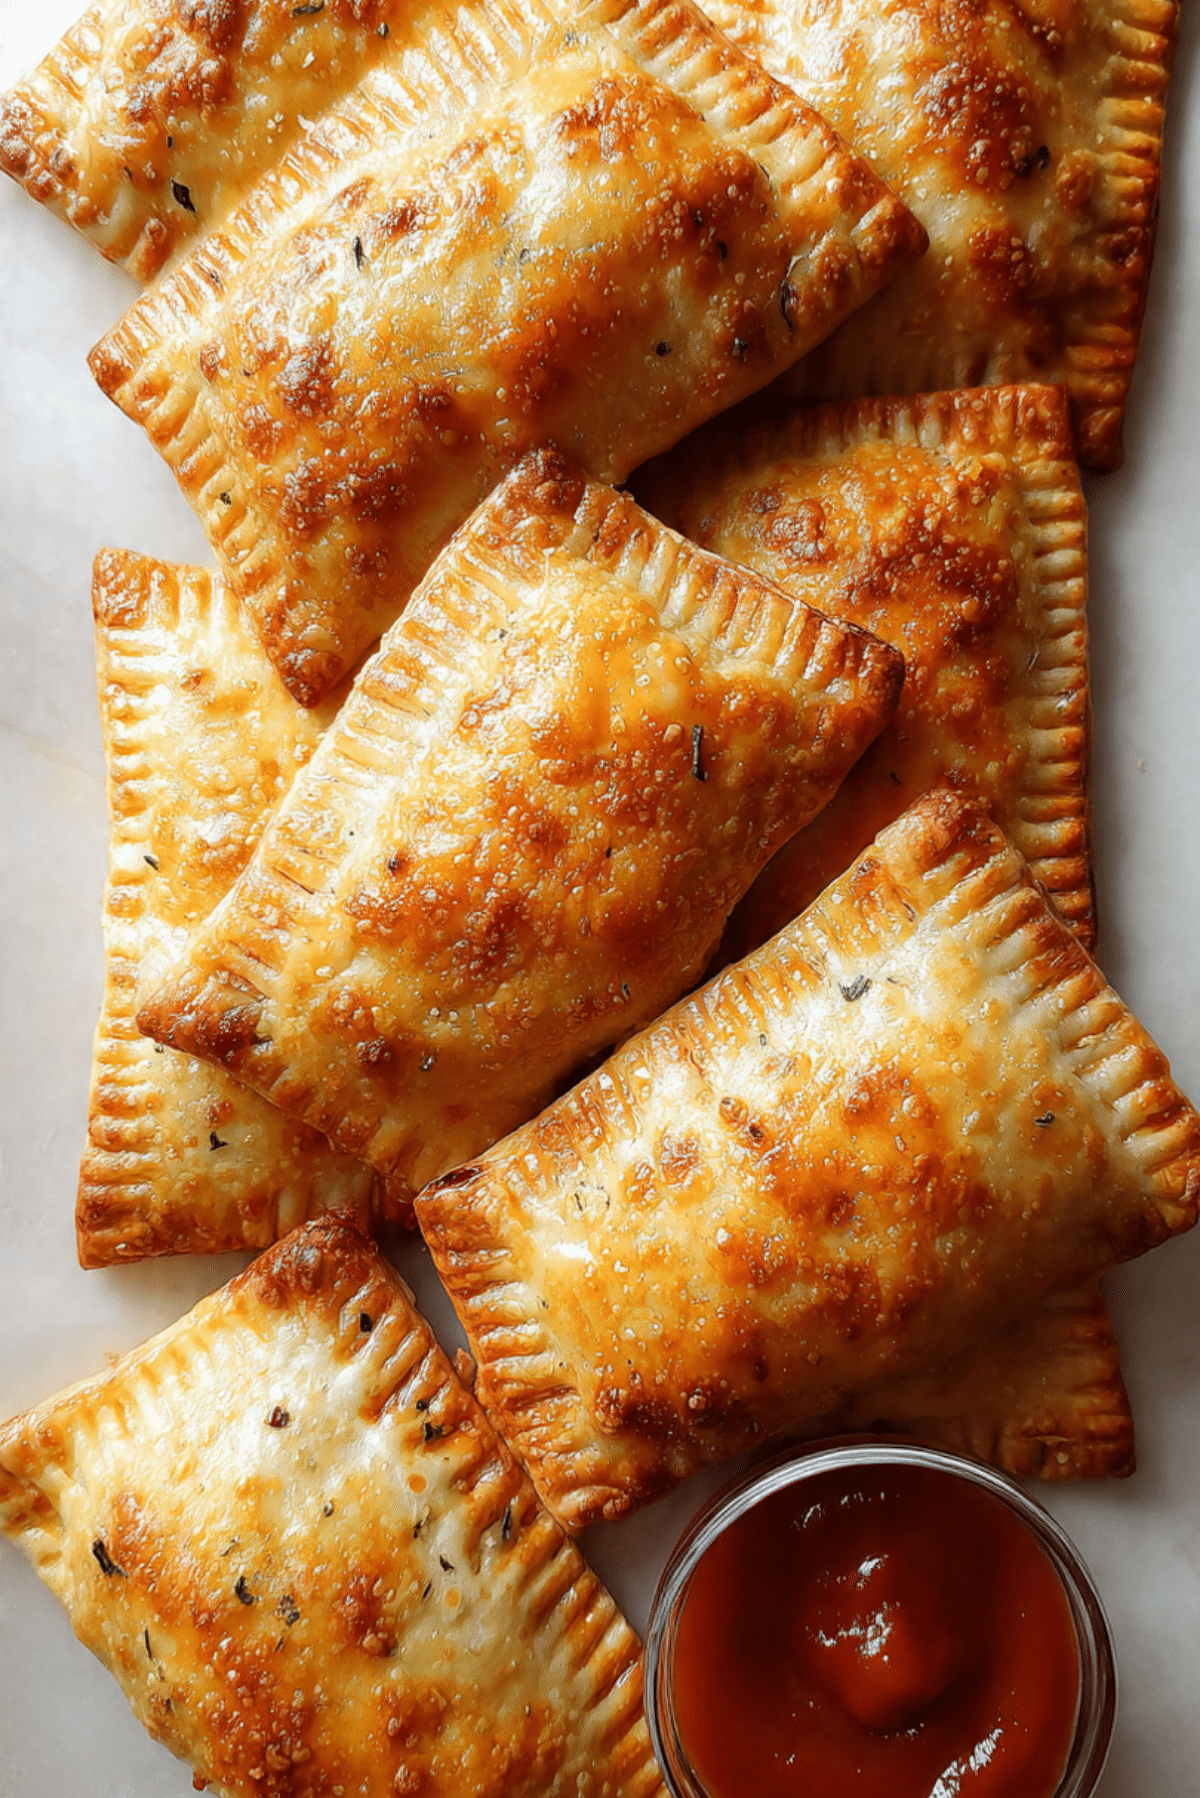
Homemade Pizza Pockets
There is something incredibly comforting about biting into a warm, golden pocket and discovering a gooey, cheesy center waiting inside. These homemade pizza pockets bring that exact moment to life, with soft dough on the outside and rich, savory filling tucked neatly within. Trust me, you’re going to love this, especially when that first bite stretches with melted cheese and the aroma of herbs fills the air.
Why These Little Pockets Always Steal the Show
As we move from that first delicious bite, it becomes clear why these are such a favorite in so many kitchens. They are simple, satisfying, and packed with everything you love about pizza, just wrapped into a neat, handheld form.
A Bite of History Behind Every Pocket
Now let’s dive into where this idea comes from. Pizza pockets are inspired by classic Italian calzones, which date back centuries. Traditionally, these folded pizzas were a way to enjoy a full meal on the go. Over time, home cooks around the world adapted the concept into smaller, snackable versions. What you get here is a modern, fun twist that keeps that original spirit alive while making it even more accessible.
Why This Recipe Works Every Single Time
Before we head into the kitchen, let me tell you why this one’s a total game-changer.
Versatile: You can fill these with almost anything you have on hand, making them perfect for experimenting with flavors.
Budget-Friendly: Simple pantry ingredients come together to create something that feels special without costing much.
Quick and Easy: Once the dough is ready, the process moves fast and smoothly.
Customizable: From vegetables to different cheeses, you can adjust everything to your taste.
Crowd-Pleasing: Kids and adults both go crazy for these, especially fresh out of the oven.
Make-Ahead Friendly: You can prepare them in advance and bake when needed.
Great for Leftovers: They reheat beautifully and taste just as satisfying the next day.
Secrets From the Kitchen That Make All the Difference
Now that you know why they work, here are a few insider tips that really elevate the result.
Always seal the edges tightly so the filling stays inside while baking.
Do not overfill, it might be tempting but it can cause leaks.
Brush the tops lightly with olive oil for that golden finish.
Let them cool slightly before eating so the filling settles perfectly.
Tools That Make the Process Smooth and Easy
Before we start assembling, having the right tools makes everything more enjoyable.
Mixing Bowl: For combining and preparing your ingredients with ease.
Rolling Pin: Helps you shape the dough evenly.
Baking Sheet: Ensures even cooking and a crisp base.
Parchment Paper: Prevents sticking and makes cleanup simple.
What You Will Need to Bring These to Life
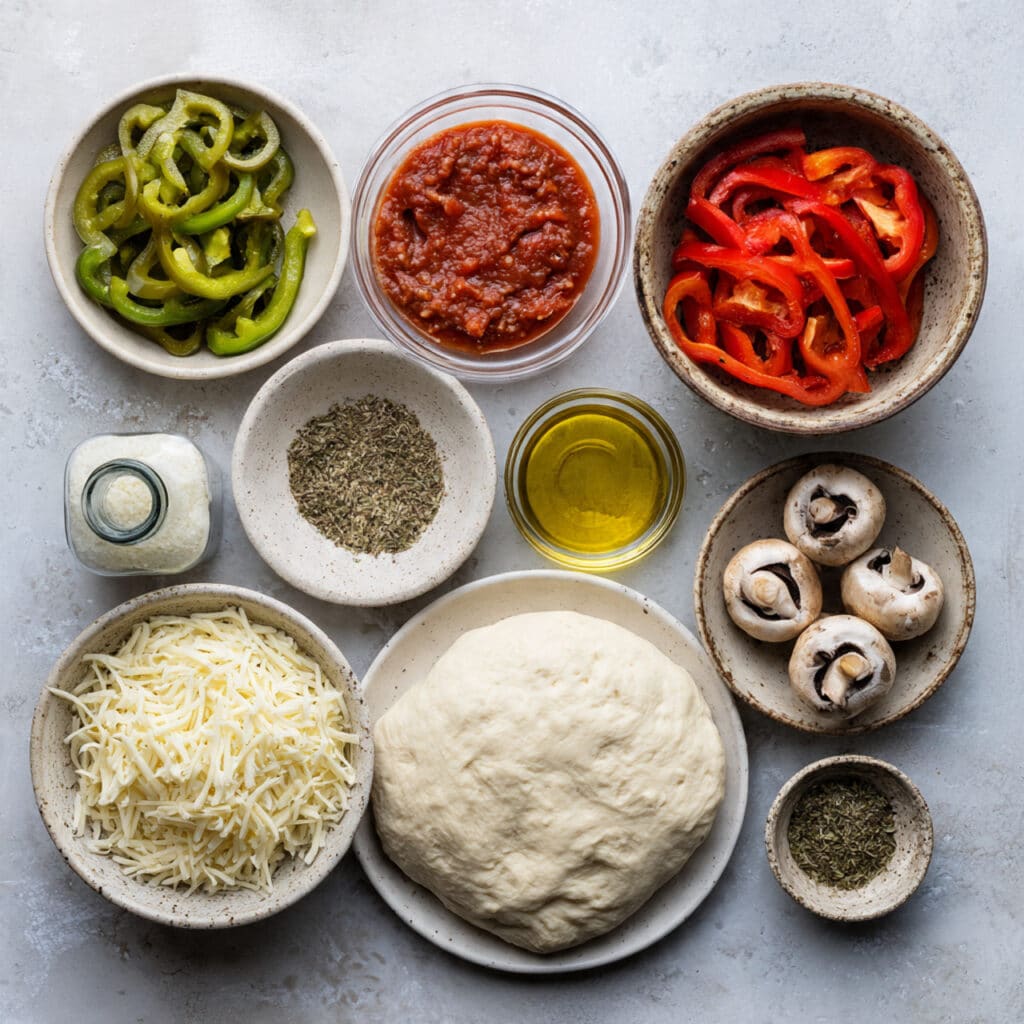
And now let’s dive into the ingredients, where everything starts to come together.
- Pizza Dough: 500 grams, soft and elastic, forms the base that holds everything together.
- Shredded Mozzarella Cheese: 200 grams, melts into that irresistible gooey center.
- Tomato Sauce: 150 ml, adds rich flavor and moisture.
- Bell Peppers: 1 cup sliced, brings a slight sweetness and color.
- Olives: 1/2 cup sliced, adds a salty, savory touch.
- Mushrooms: 1 cup sliced, gives an earthy depth to the filling.
- Olive Oil: 2 tablespoons, helps create that golden crust.
- Dried Oregano: 1 teaspoon, adds a classic aromatic finish.
Easy Swaps You Can Try Without Stress
If you want to switch things up, here are a few ideas.
Mozzarella Cheese: Try cheddar or a mixed cheese blend.
Bell Peppers: Substitute with spinach or zucchini.
Olives: Use corn or skip entirely if preferred.
Mushrooms: Replace with cooked onions for a sweeter flavor.
Star Ingredients That Make the Magic Happen
Let’s highlight what really brings everything together.
Mozzarella Cheese: This is the heart of the filling, giving that stretchy, creamy texture everyone loves.
Tomato Sauce: It ties all the flavors together with its rich and slightly tangy taste.
Let’s Get Cooking Step by Step
Now comes the fun part, bringing everything together.
- Preheat Your Equipment: Set your oven to 200°C and line a baking sheet with parchment paper.
- Combine Ingredients: In a bowl, mix the tomato sauce, bell peppers, olives, mushrooms, and oregano until evenly combined.
- Prepare Your Cooking Vessel: Roll out the pizza dough and cut it into equal circles.
- Assemble the Dish: Place a spoonful of filling and mozzarella cheese in the center of each dough circle, fold over, and seal the edges firmly.
- Cook to Perfection: Arrange the pockets on the baking sheet, brush lightly with olive oil, and bake for 15 to 20 minutes until golden brown.
- Finishing Touches: Remove from the oven and let them cool slightly.
- Serve and Enjoy: Serve warm with extra sauce for dipping if you like.
The Texture and Flavor Story in Every Bite
As they bake, the dough turns beautifully golden and slightly crisp on the outside while staying soft inside. The cheese melts into the vegetables and sauce, creating a rich, savory filling that feels both comforting and satisfying. Every bite gives you a mix of textures, from crisp edges to gooey centers.
Helpful Tips to Get It Just Right
A few small tricks can make a big difference.
- Use fresh ingredients for the best flavor
- Do not skip sealing the edges properly
- Let them rest briefly before serving
What to Avoid for the Best Results
Even simple recipes have a few things to watch out for.
- Overfilling the pockets can cause them to burst
- Baking at too low temperature may result in a soft crust
- Skipping parchment paper can lead to sticking
A Quick Look at Nutrition
Servings: 6
Calories per serving: 320
Note: These are approximate values.
Time Breakdown for Easy Planning
Prep Time: 20 minutes
Cook Time: 20 minutes
Total Time: 40 minutes
Make Ahead and Storage Tips
If you are planning ahead, you can assemble the pockets and store them in the fridge for up to one day before baking. Once cooked, they can be stored in an airtight container for up to three days. Reheat in the oven to bring back that crisp texture. They also freeze well, just bake from frozen with a few extra minutes added.
How to Serve Them for Maximum Enjoyment
Serve these warm with a side of tomato sauce or a fresh salad. They also pair nicely with a light soup, making them a complete and comforting meal.
Creative Ways to Use Leftovers
If you have leftovers, try slicing them and adding to a lunchbox, or reheat and serve with eggs for a fun breakfast twist. You can even chop them into smaller pieces and toss into a salad.
Extra Tips for Even Better Results
Use a light hand when rolling the dough so it stays soft.
Keep fillings balanced so no single flavor overpowers the others.
Make Them Look as Good as They Taste
Brush with a bit of olive oil before baking for a shiny finish. A sprinkle of oregano on top adds a nice visual touch and aroma.
Fun Variations to Try Next Time
Try adding spicy peppers for heat.
Use different cheeses for a richer taste.
Add cooked chicken or turkey for extra protein.
Make mini versions for parties and snacks.
FAQ’s
Q1: Can I use store-bought dough?
Yes, it works perfectly and saves time.
Q2: Can I freeze them before baking?
Yes, freeze them assembled and bake directly from frozen.
Q3: How do I prevent leaking?
Seal edges tightly and avoid overfilling.
Q4: Can I make them vegetarian?
They already are, just keep using vegetable fillings.
Q5: Can I air fry them?
Yes, cook at 180°C for about 10 to 12 minutes.
Q6: What cheese works best?
Mozzarella is ideal for its melting quality.
Q7: Can I add meat?
Yes, cooked chicken or turkey works well.
Q8: How do I reheat them?
Use the oven to maintain crispiness.
Q9: Can I make them smaller?
Absolutely, mini versions are great for snacks.
Q10: Do they stay crispy?
They are best fresh but can be reheated to regain texture.
Conclusion
And just like that, you have a batch of warm, golden pockets ready to enjoy. This one’s a total game-changer when you want something comforting yet fun to make. Let me tell you, it’s worth every bite, especially when shared with friends or family around the table.
Print
Homemade Pizza Pockets
- Total Time: 40 minutes
- Yield: 6 servings
- Diet: Vegetarian
Description
Golden, crispy pizza pockets filled with gooey melted cheese, rich tomato sauce, and flavorful vegetables, perfect for a quick snack or family meal.
Ingredients
- 500 grams pizza dough
- 200 grams shredded mozzarella cheese
- 150 ml tomato sauce
- 1 cup sliced bell peppers
- 1/2 cup sliced olives
- 1 cup sliced mushrooms
- 2 tablespoons olive oil
- 1 teaspoon dried oregano
Instructions
- Preheat your oven to 200°C and line a baking sheet with parchment paper.
- In a bowl, mix the tomato sauce, bell peppers, olives, mushrooms, and oregano until well combined.
- Roll out the pizza dough and cut it into equal circles.
- Place a spoonful of the mixture and shredded mozzarella cheese in the center of each dough circle.
- Fold the dough over and seal the edges firmly.
- Arrange on the baking sheet and brush lightly with olive oil.
- Bake for 15 to 20 minutes until golden brown.
- Let cool slightly, then serve warm.
Notes
- Seal edges tightly to prevent filling from leaking.
- Do not overfill the pockets for best results.
- Let them cool slightly before eating to allow filling to set.
- Prep Time: 20 minutes
- Cook Time: 20 minutes
- Category: Snack
- Method: Baking
- Cuisine: Italian-inspired
Nutrition
- Serving Size: 1 serving
- Calories: 320
- Sugar: 4g
- Sodium: 480mg
- Fat: 12g
- Saturated Fat: 5g
- Unsaturated Fat: 6g
- Trans Fat: 0g
- Carbohydrates: 40g
- Fiber: 3g
- Protein: 12g
- Cholesterol: 20mg