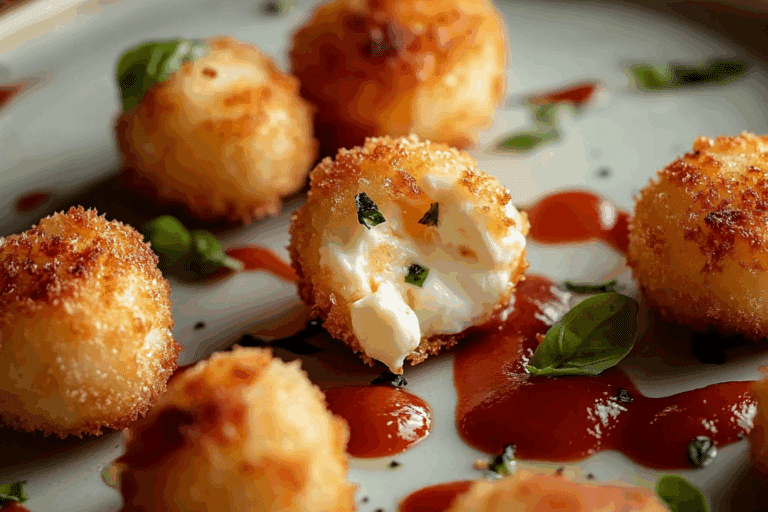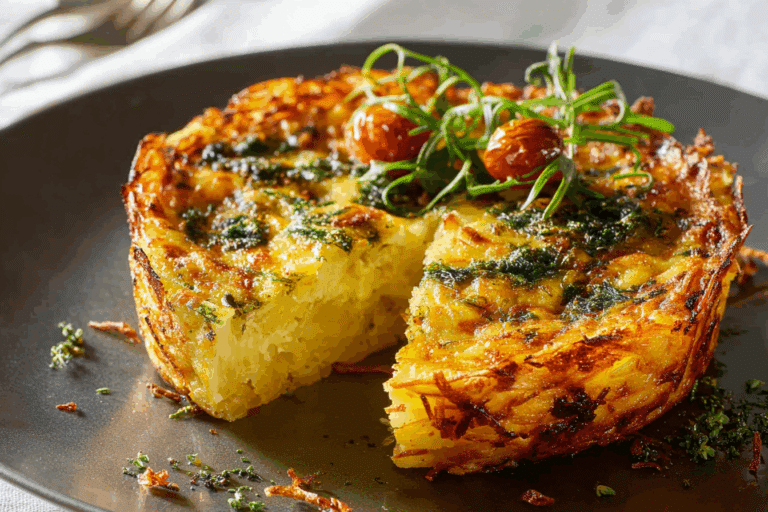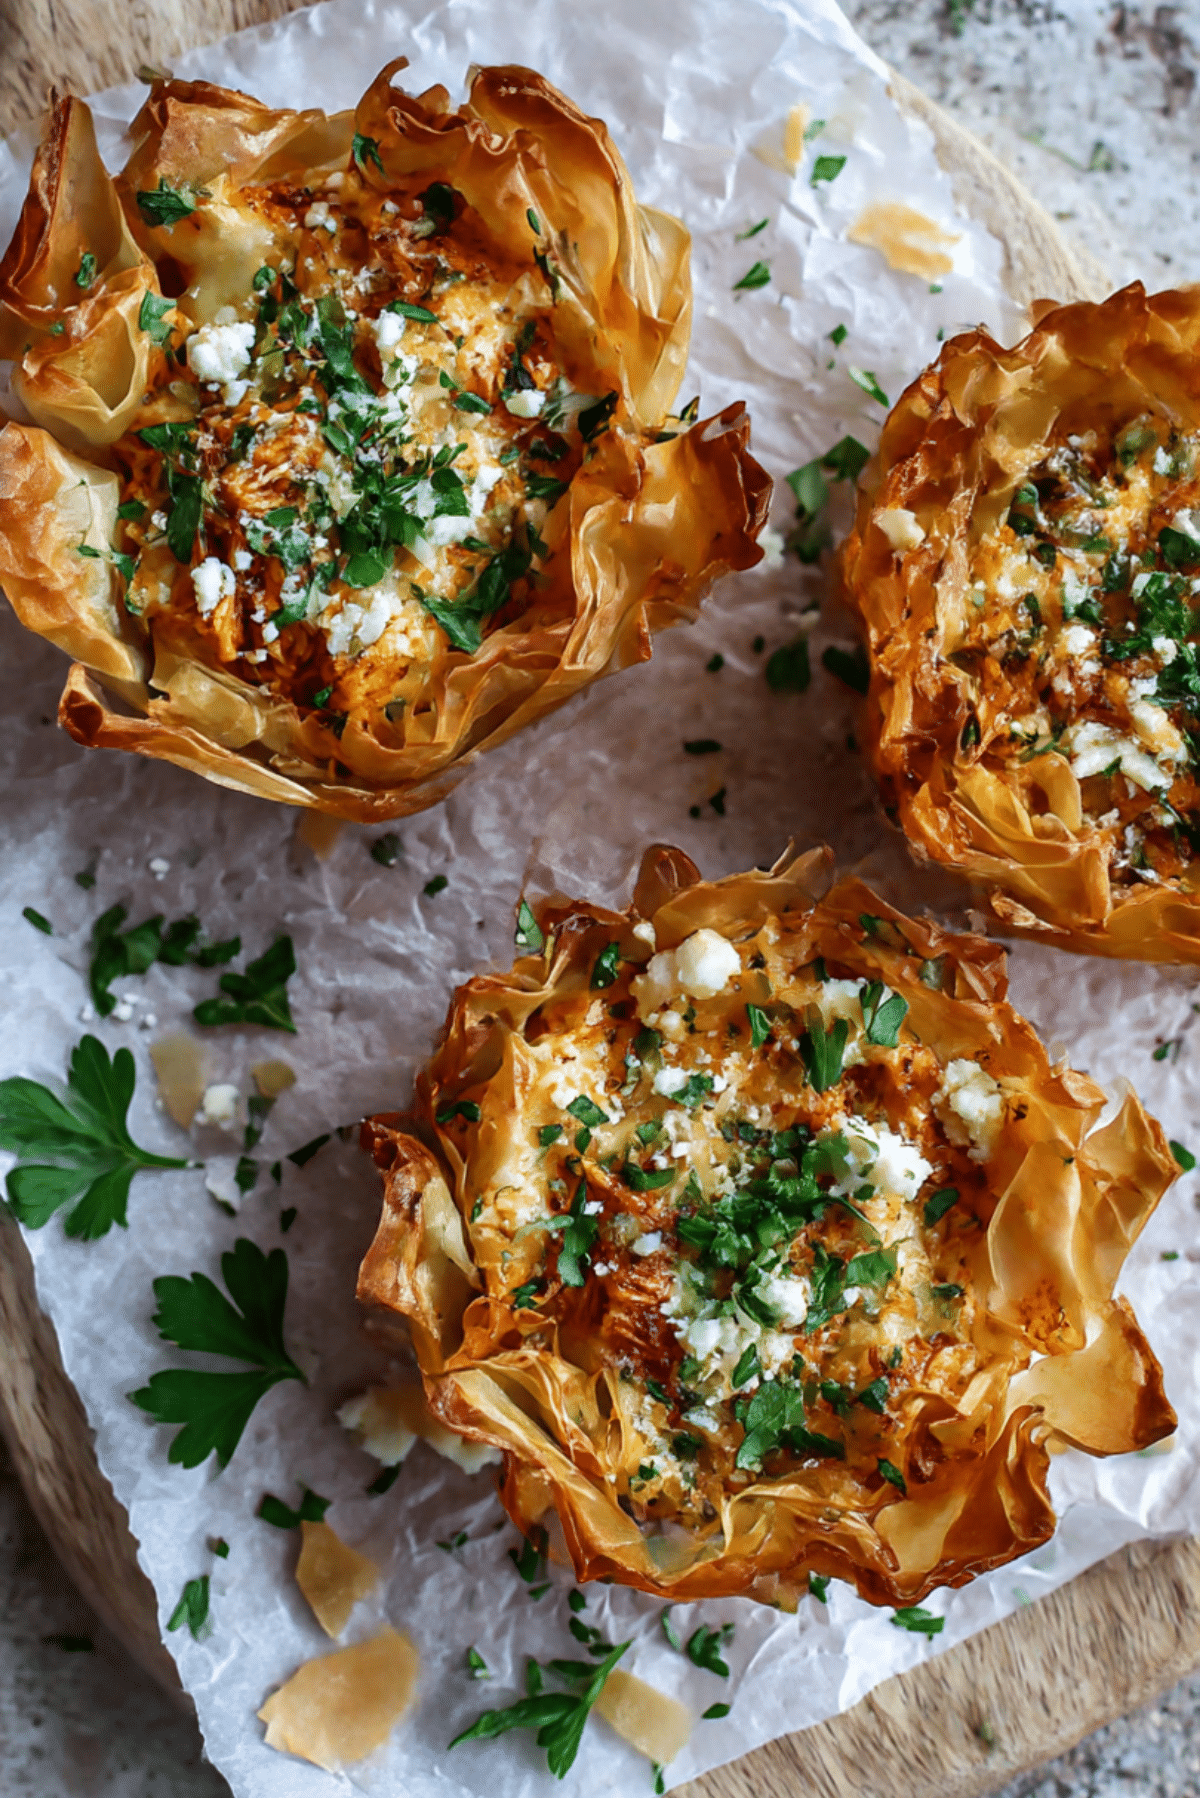
Harissa Chicken Filo Nests
There’s something irresistibly charming about food that’s wrapped, folded, or cradled. These Harissa Chicken Filo Nests are just that—delicate little bundles of flaky pastry filled with juicy, spiced chicken and creamy feta, kissed with the bold heat of harissa. Every bite offers crunch, spice, and comfort, all at once. It’s the kind of dish that invites curiosity at the table, but more importantly, it delivers joy with every mouthful.
Behind the Recipe
This recipe came about during one of those kitchen adventures where creativity meets cravings. I had leftover roast chicken and a few sheets of filo pastry hiding in the back of the fridge, and I knew something magical could happen. The warm spice of harissa felt like the perfect way to bring it all together. What began as an experiment turned into one of my most-requested dishes at gatherings.
Recipe Origin or Trivia
Harissa is a North African chili paste that has made its way into kitchens around the world, known for its smoky, spicy depth. It originates from Tunisia and is traditionally made with roasted red peppers, hot chili peppers, garlic, and spices like coriander and caraway. Filo pastry, meanwhile, is a staple in Mediterranean and Middle Eastern cuisines, beloved for its delicate crispiness. This dish blends both influences, offering a modern twist that’s as visually appealing as it is delicious.
Why You’ll Love Harissa Chicken Filo Nests
These little nests aren’t just cute, they’re clever. Packed with bold flavors and wrapped in golden layers, they bring a lot to the table. Here’s why you’ll keep coming back to them:
Versatile: Great for brunch, lunch, or a dinner party starter. Dress them up or keep them casual.
Budget-Friendly: Uses pantry staples and leftover chicken. Filo sheets stretch a long way.
Quick and Easy: Minimal prep, especially if your chicken is pre-cooked.
Customizable: Adjust the spice level, switch up cheeses, or go veggie.
Crowd-Pleasing: The look, the crunch, the flavor—everyone’s intrigued and impressed.
Make-Ahead Friendly: Assemble earlier in the day, bake right before serving.
Great for Leftovers: They reheat well and can be frozen after baking too.
Chef’s Pro Tips for Perfect Results
A few insider notes can turn this good recipe into an unforgettable one:
- Use room temperature filo: Cold filo cracks easily. Let it sit covered for about 15–20 minutes before using.
- Layer with olive oil, not butter: Olive oil keeps the filo lighter and lets the spices shine through.
- Don’t overfill: Less is more here. You want each nest to bake evenly and stay crisp.
- Bake on a preheated tray: This helps the bottom crisp up nicely without sogginess.
- Add feta last: Crumble it on top right before baking for a creamy finish that doesn’t melt away.
Kitchen Tools You’ll Need
Keep it simple with these essentials:
Mixing Bowl: For combining the chicken mixture.
Pastry Brush: To lightly oil your filo layers.
Muffin Tin: Helps shape those perfect little nests.
Sharp Knife or Kitchen Scissors: To cut the filo sheets neatly.
Baking Sheet or Tray: For crisping up the bottoms.
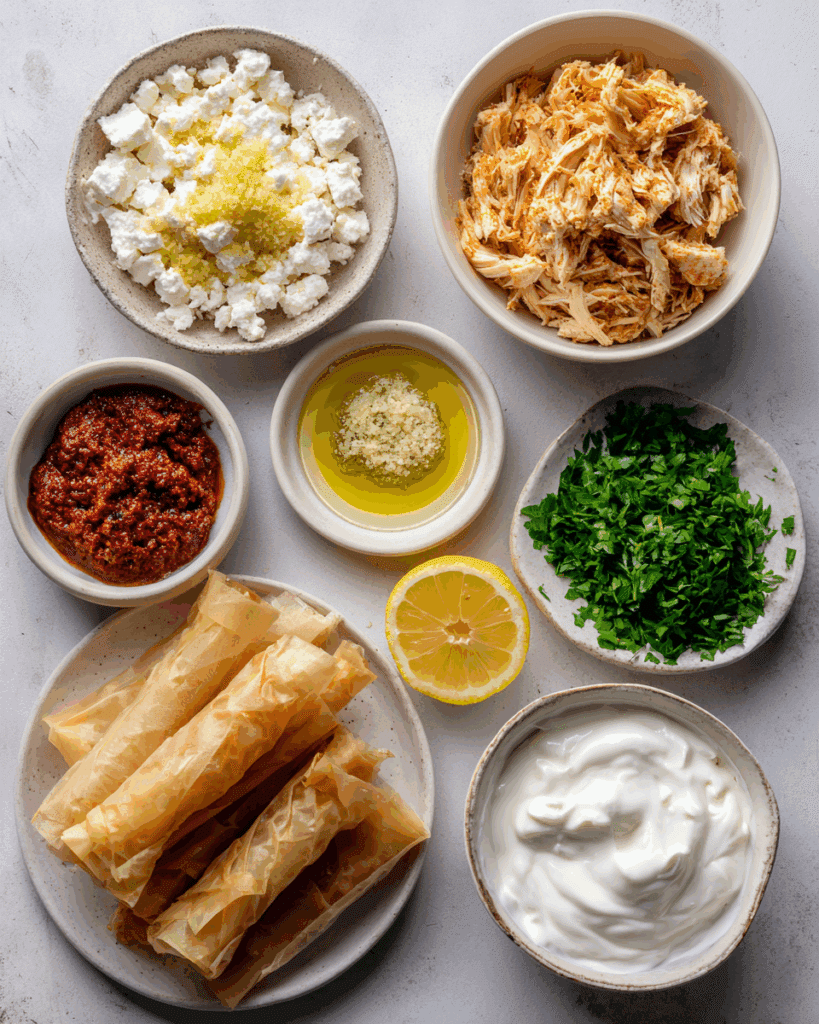
Ingredients in Harissa Chicken Filo Nests
The beauty of this recipe lies in how these ingredients work together—heat, creaminess, tang, and crunch all in harmony.
- Cooked Shredded Chicken: 2 cups. The base of the filling, tender and ready to soak up flavor.
- Harissa Paste: 2 tablespoons. Brings heat, smokiness, and a gorgeous red hue.
- Filo Pastry Sheets: 6 to 8 sheets. Thin, crisp, and perfect for creating flaky layers.
- Feta Cheese: 1/2 cup crumbled. Adds salty creaminess that balances the heat.
- Plain Yogurt: 1/4 cup. Helps bind the filling while adding a touch of tang.
- Olive Oil: 3 tablespoons. For brushing the filo and enhancing richness.
- Chopped Fresh Parsley: 2 tablespoons. Adds freshness and a burst of color.
- Lemon Zest: 1 teaspoon. A bright note that lifts the whole dish.
- Minced Garlic: 1 clove. Subtle but essential for savory depth.
- Salt: 1/2 teaspoon. Enhances all the other flavors.
Ingredient Substitutions
It’s easy to make this recipe work with what you have:
Chicken: Use shredded rotisserie or leftover turkey.
Harissa Paste: Try sriracha or red chili pesto for a milder twist.
Feta: Goat cheese or ricotta can be swapped in.
Yogurt: Sour cream or labneh work well too.
Parsley: Use cilantro or mint for a different flavor profile.
Ingredient Spotlight
Harissa Paste: A fiery red chili paste from Tunisia that adds smoky spice, complexity, and color.
Filo Pastry: Ultra-thin pastry that bakes into beautifully crisp layers, giving these nests their signature crunch.
Instructions for Making Harissa Chicken Filo Nests
These filo nests are fun to make and even more fun to eat. Let’s get rolling.
- Preheat Your Equipment:
Set your oven to 375°F (190°C) and lightly grease a muffin tin. - Combine Ingredients:
In a large bowl, mix the shredded chicken, harissa paste, yogurt, crumbled feta, parsley, lemon zest, garlic, and salt. Stir until everything is coated and combined. - Prepare Your Cooking Vessel:
Lay out your filo sheets. Cut them into quarters, stack 3 to 4 pieces per nest, brushing lightly with olive oil between layers. Gently press the stacks into the muffin tin cups to form little nests. - Assemble the Dish:
Spoon the chicken mixture evenly into each nest. Top with a bit of extra feta if desired. - Cook to Perfection:
Bake for 20 to 25 minutes, until the filo is golden and crisp and the filling is hot. - Finishing Touches:
Let them cool for 5 minutes before gently lifting out. Garnish with more parsley and a drizzle of yogurt or olive oil if you like. - Serve and Enjoy:
Serve warm as a starter, brunch item, or light meal with a fresh salad.
Texture & Flavor Secrets
These nests are all about contrast. The outer filo is impossibly crisp and golden, while the inside stays juicy and tender thanks to the yogurt and cheese. The harissa brings a warm, smoky heat that’s tamed by the creamy feta and lifted by lemon zest. Each bite feels complete, layered, and crave-worthy.
Cooking Tips & Tricks
You’ve got this! And here are a few tips to keep it stress-free:
- Use a damp towel to cover filo while working to prevent drying out.
- Taste the filling before assembling to adjust salt and spice.
- For a party, make mini versions in smaller muffin tins.
What to Avoid
Even the best cooks hit a few snags—let’s dodge them.
- Overfilling nests: Makes them hard to remove and soggy at the base.
- Skipping oil between filo layers: You’ll miss out on those crispy, golden edges.
- Not letting them rest after baking: They firm up and hold better when cooled briefly.
Nutrition Facts
Servings: 6
Calories per serving: 260
Note: These are approximate values.
Preparation Time
Prep Time: 20 minutes
Cook Time: 25 minutes
Total Time: 45 minutes
Make-Ahead and Storage Tips
You can absolutely get ahead on this one. Assemble the nests up to 6 hours in advance and refrigerate until ready to bake. After baking, store leftovers in an airtight container in the fridge for up to 3 days. To reheat, pop them back in a hot oven for 10 minutes. You can also freeze them baked and reheat straight from frozen.
How to Serve Harissa Chicken Filo Nests
These are stunning on a platter with a yogurt and mint dipping sauce. Pair with a crisp cucumber salad or serve alongside a mezze board. They make a lovely lunch with a bowl of lentil soup or as part of a weekend brunch spread.
Creative Leftover Transformations
If you’ve got a few left over, here’s how to bring them back to life:
- Chop and mix into a grain bowl with quinoa and tahini.
- Crumble into scrambled eggs or an omelet.
- Slice and stuff into a pita with lettuce and tomato.
Additional Tips
- Let the nests rest in the tin for a few minutes before lifting.
- If using frozen filo, thaw overnight in the fridge for best results.
- Add a pinch of cumin or smoked paprika for even more depth.
Make It a Showstopper
Presentation matters, and these nests are already halfway there. Serve on a rustic wooden board lined with parchment. Add scattered herbs and lemon wedges for color. A final drizzle of infused olive oil right before serving gives them a glossy finish and extra flair.
Variations to Try
- Vegetarian Option: Swap chicken for roasted chickpeas and sweet potato.
- Cheesy Delight: Add grated halloumi for extra saltiness.
- Spicy Kick: Stir in chopped jalapeño or chili flakes.
- Sweet and Savory: Add caramelized onions for richness.
- Nutty Crunch: Top with toasted pine nuts before baking.
FAQ’s
Q1: Can I make these ahead for a party?
Yes, assemble them in advance and refrigerate. Bake just before serving for maximum crispiness.
Q2: Can I freeze them?
Absolutely. Freeze after baking and reheat at 375°F until hot.
Q3: What if I don’t have harissa?
Use chili paste or sriracha with a touch of smoked paprika.
Q4: Can I use puff pastry instead?
Filo gives the signature crispness, but puff pastry works for a heartier, flakier version.
Q5: Are they spicy?
They’re warm but not overly hot. Adjust harissa to your taste.
Q6: Can I make them dairy-free?
Yes, use plant-based yogurt and dairy-free cheese alternatives.
Q7: How do I keep filo from tearing?
Work gently and keep it covered with a damp towel while assembling.
Q8: Can I make mini versions?
Definitely. Use mini muffin tins and reduce the baking time slightly.
Q9: How long do leftovers last?
Up to 3 days in the fridge. Reheat in the oven for best texture.
Q10: What can I serve with them?
Salads, mezze spreads, soups, or even as part of a brunch platter.
Conclusion
Whether you’re hosting friends or just treating yourself, these Harissa Chicken Filo Nests are the kind of dish that brings smiles and second helpings. They’re flaky, fiery, and full of flavor. Trust me, this one’s a total game-changer. Give it a try and savor every bite.
Print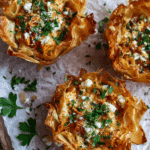
Harissa Chicken Filo Nests
- Total Time: 45 minutes
- Yield: 6 servings
- Diet: Halal
Description
Flaky, golden filo pastry nests filled with spicy harissa chicken, creamy feta, and fresh herbs. A bold, crowd-pleasing dish perfect for entertaining or a cozy dinner.
Ingredients
- 2 cups cooked shredded chicken
- 2 tablespoons harissa paste
- 6 to 8 sheets filo pastry
- 1/2 cup crumbled feta cheese
- 1/4 cup plain yogurt
- 3 tablespoons olive oil
- 2 tablespoons chopped fresh parsley
- 1 teaspoon lemon zest
- 1 clove minced garlic
- 1/2 teaspoon salt
Instructions
- Preheat your oven to 375°F (190°C) and lightly grease a muffin tin.
- In a large bowl, mix shredded chicken, harissa paste, yogurt, crumbled feta, parsley, lemon zest, garlic, and salt until well combined.
- Lay out filo sheets, cut into quarters. Stack 3 to 4 pieces per nest, brushing with olive oil between each layer.
- Gently press the stacks into the muffin tin to form nest shapes.
- Spoon the chicken mixture evenly into each nest. Top with extra feta if desired.
- Bake for 20 to 25 minutes, until the filo is golden and crisp.
- Let cool for 5 minutes before removing from the tin. Garnish and serve warm.
Notes
- Keep filo covered with a damp towel while working to prevent drying out.
- Use leftover rotisserie chicken for quicker prep.
- These nests freeze well and can be reheated in the oven.
- Prep Time: 20 minutes
- Cook Time: 25 minutes
- Category: Appetizer
- Method: Baking
- Cuisine: Fusion
Nutrition
- Serving Size: 1 nest
- Calories: 260
- Sugar: 1g
- Sodium: 420mg
- Fat: 16g
- Saturated Fat: 5g
- Unsaturated Fat: 9g
- Trans Fat: 0g
- Carbohydrates: 16g
- Fiber: 1g
- Protein: 17g
- Cholesterol: 55mg