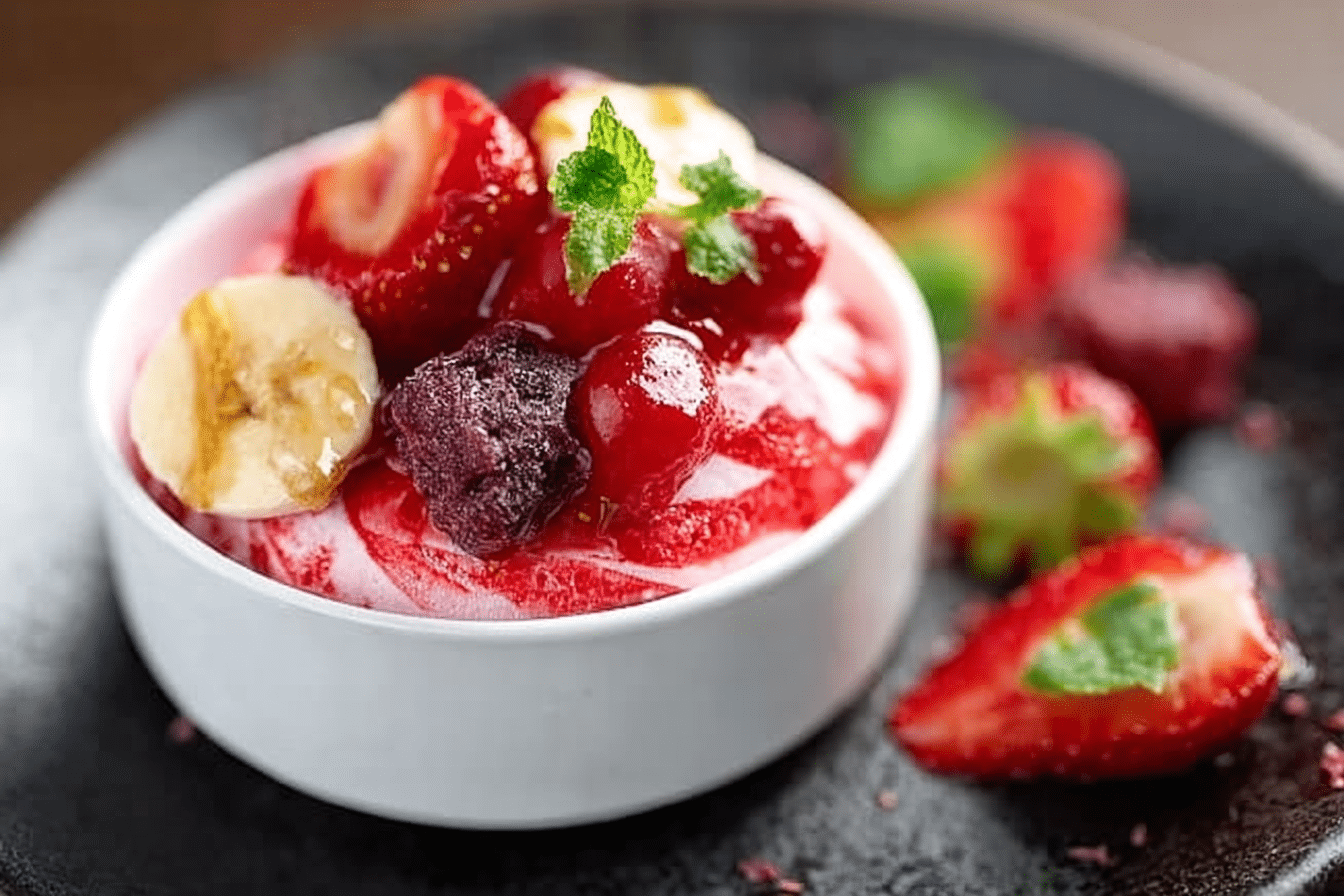
Dog Ice Cream Recipe: Treat Your Furry Friend!
Treat your furry friend to homemade Dog Ice Cream! Healthy and refreshing, it’s the perfect way to cool them down on a hot day. This delightful treat not only satisfies their taste buds but is also packed with nutritious ingredients that will make your pup wag their tail with joy. You’ll love how easy it is to whip up this delicious Dog Ice Cream that your canine companion will adore!
Why You’ll Love This Recipe
- Quick and Easy: This recipe requires minimal ingredients and can be made in just a few minutes.
- Healthy Ingredients: You know exactly what goes into this treat, keeping it nutritious and safe for your dog.
- Customizable: You can easily tailor the flavors to your dog’s preferences and dietary needs.
- Fun for Hot Days: It’s a perfect way to help your pup cool off during those sweltering summer afternoons.
- Bonding Experience: Making Dog Ice Cream together can be a fun activity that strengthens your bond with your furry friend.
Ingredients You’ll Need
This Dog Ice Cream recipe is incredibly simple, requiring just a handful of essential ingredients that each contribute to the creamy texture and delicious flavor. Let’s take a look at what you’ll need:
- Bananas: These add natural sweetness and are great for your dog’s digestion.
- Peanut Butter: Make sure it’s xylitol-free; this ingredient provides rich flavor and healthy fats.
- Coconut Milk: Creamy and hydrating, it gives the ice cream a smooth texture.
- Yogurt: Plain, unsweetened yogurt adds probiotics, which are beneficial for your dog’s gut health.
- Optional Add-ins: Feel free to include fruits or veggies your dog loves for extra flavor and nutrition.
Note: the full ingredients list, including measurements, is provided in the recipe card directly below.
Variations for Dog Ice Cream
One of the best parts about making Dog Ice Cream is that you can easily customize it based on what your dog enjoys or any dietary restrictions they may have. Here are some fun variations:
- Berry Blast: Add fresh blueberries or strawberries for a fruity twist that’s packed with antioxidants.
- Carrot Delight: Incorporate finely grated carrots for added vitamins and a crunchy texture.
- Pumpkin Spice: Use pure pumpkin puree for a seasonal flavor and a boost of fiber.
- Minty Fresh: A hint of fresh mint can add a refreshing taste and help freshen your dog’s breath.
- Veggie Mix: Blend in some spinach or kale for an extra nutritious kick if your dog enjoys greens.

How to Make Dog Ice Cream
Step 1: Prepare the Ingredients
Begin by gathering all your ingredients. Make sure your bananas are ripe, as this will enhance the sweetness of the Dog Ice Cream. If you’re adding any optional ingredients, prepare them as well, ensuring they are dog-safe.
Step 2: Blend the Base
In a blender or food processor, combine the bananas, peanut butter, coconut milk, and yogurt. Blend until you achieve a smooth and creamy consistency. This step is crucial for ensuring that the Dog Ice Cream has a delightful texture.
Step 3: Add Optional Ingredients
If you’re using any optional add-ins, now is the time to toss them into the blender. Blend again just enough to incorporate them, but don’t over-blend as you want those chunks to remain intact for your pup to enjoy.
Step 4: Pour and Freeze
Pour the mixture into ice cube trays or silicone molds. This is where the magic happens! Place them in the freezer and allow them to freeze for at least 4-6 hours or until solid.
Step 5: Serve and Enjoy
Once frozen, pop out a few cubes of Dog Ice Cream and let your furry friend enjoy their tasty treat! You can also let them soften for a few minutes before serving to make it easier for them to eat.
Pro Tips for Making Dog Ice Cream
- Use Ripe Bananas: The riper the bananas, the sweeter your Dog Ice Cream will be, without added sugar.
- Check Ingredients: Always read labels to ensure your peanut butter and yogurt are dog-friendly.
- Experiment with Flavors: Don’t hesitate to try different fruit combinations to see what your dog loves the most.
- Small Batches: Start with a small batch to see how your dog reacts to new flavors before making larger quantities.
- Serve in Moderation: Treat this as a special snack and not a meal replacement, to keep your dog’s diet balanced.
How to Serve Dog Ice Cream
Garnishes
Get creative with garnishes! You can sprinkle some crumbled dog biscuits or shredded coconut on top for an extra touch that will make your pup’s tail wag.
Side Dishes
Pair the Dog Ice Cream with some crunchy carrot sticks or a slice of apple for a refreshing and healthy snack combo that your pet will adore.
Creative Ways to Present
Consider serving the Dog Ice Cream in a cute dog-friendly bowl or even on a dog-safe waffle cone for a fun treat that feels special. You can also create a “doggy sundae” by layering different flavors in a bowl.
Make Ahead and Storage
Storing Leftovers
If you have any Dog Ice Cream left, you can store it in an airtight container in the freezer. Make sure to cover it well to prevent freezer burn and keep it fresh.
Freezing
The Dog Ice Cream can be stored in the freezer for up to a month. Just remember to let it sit out for a few minutes before serving so it softens slightly.
Reheating
There’s no need to reheat Dog Ice Cream, as it should be served frozen. Just allow it to thaw a little if it’s too hard for your dog to enjoy right away.
FAQs
Can I use flavored yogurt?
It’s best to stick with plain, unsweetened yogurt to avoid added sugars and artificial ingredients that could be harmful to your dog.
Is this recipe safe for all dog breeds?
Generally, yes! However, if your dog has specific food allergies or sensitivities, consult with your vet before introducing new treats.
How often can I give my dog this treat?
You can serve Dog Ice Cream as an occasional treat, but it should not replace your dog’s regular diet. Moderation is key!
Can I use other types of milk?
While coconut milk works wonderfully, you can also experiment with almond milk or even goat’s milk, just ensure they are safe for dogs.
What if my dog doesn’t like bananas?
No problem! You can replace bananas with other dog-friendly fruits like pumpkin puree or apples, just make sure they are safe and suitable for your pet.
Final Thoughts
Making Dog Ice Cream is a fun and rewarding way to treat your furry friend to something special. It’s easy, healthy, and customizable to suit your dog’s tastes. So, gather your ingredients, get blending, and watch your pup enjoy this delightful treat. Trust me, the wagging tails and happy barks will be worth every effort!
Related Posts
- 3 Ingredient Peanut Butter Cheerio Bars Made Easy
- Mac Cheese Bacon Burger Rolls for Ultimate Flavor
- Tater Tot Pizza Casserole for a Fun Family Dinner
Dog Ice Cream
- Total Time: 6 hours
- Yield: Approximately 12 servings
- Diet: Gluten Free
Description
Treat your furry friend to homemade Dog Ice Cream! Healthy and refreshing, it’s perfect for cooling them down on hot days. Packed with nutritious ingredients, this delightful treat will make your pup wag their tail with joy.
Ingredients
Main Ingredients
- 2 ripe Bananas
- 1/2 cup Peanut Butter (xylitol-free)
- 1 cup Coconut Milk
- 1 cup Plain, Unsweetened Yogurt
Optional Add-ins
- 1/2 cup fresh Blueberries or Strawberries
- 1/2 cup finely grated Carrots
- 1/2 cup pure Pumpkin Puree
- 1/4 cup fresh Mint leaves
- 1/2 cup Spinach or Kale
Instructions
- Prepare the Ingredients: Begin by gathering all your ingredients. Make sure your bananas are ripe, as this will enhance the sweetness of the Dog Ice Cream. If you’re adding any optional ingredients, prepare them as well, ensuring they are dog-safe.
- Blend the Base: In a blender or food processor, combine the bananas, peanut butter, coconut milk, and yogurt. Blend until you achieve a smooth and creamy consistency. This step is crucial for ensuring that the Dog Ice Cream has a delightful texture.
- Add Optional Ingredients: If you’re using any optional add-ins, now is the time to toss them into the blender. Blend again just enough to incorporate them, but don’t over-blend as you want those chunks to remain intact for your pup to enjoy.
- Pour and Freeze: Pour the mixture into ice cube trays or silicone molds. This is where the magic happens! Place them in the freezer and allow them to freeze for at least 4-6 hours or until solid.
- Serve and Enjoy: Once frozen, pop out a few cubes of Dog Ice Cream and let your furry friend enjoy their tasty treat! You can also let them soften for a few minutes before serving to make it easier for them to eat.
Notes
- Use Ripe Bananas: The riper the bananas, the sweeter your Dog Ice Cream will be, without added sugar.
- Check Ingredients: Always read labels to ensure your peanut butter and yogurt are dog-friendly.
- Experiment with Flavors: Don’t hesitate to try different fruit combinations to see what your dog loves the most.
- Small Batches: Start with a small batch to see how your dog reacts to new flavors before making larger quantities.
- Serve in Moderation: Treat this as a special snack and not a meal replacement, to keep your dog’s diet balanced.
- Prep Time: 10 minutes
- Cook Time: 0 minutes
- Category: Dog Treats
- Method: Blending and Freezing
- Cuisine: Homemade
Nutrition
- Serving Size: 1 cube
- Calories: 50
- Sugar: 3g
- Sodium: 5mg
- Fat: 3g
- Saturated Fat: 1g
- Unsaturated Fat: 2g
- Trans Fat: 0g
- Carbohydrates: 5g
- Fiber: 1g
- Protein: 2g
- Cholesterol: 0mg