Chocolate Croissants Recipe
The smell of buttery pastry drifting through the kitchen is one of those small joys that makes baking feel magical. When chocolate croissants come out of the oven, golden, flaky, and slightly crisp on the outside with soft layers inside, it is almost impossible to wait for them to cool. Break one open and the warm chocolate melts gently into the tender pastry layers. Trust me, you’re going to love this.
These pastries feel luxurious, yet making them at home turns the experience into something even more special. With simple ingredients and a bit of patience, you get a bakery style treat that feels like it came straight from a Paris café.
The Irresistible Charm of Buttery Chocolate Pastry
There is something comforting about the balance of crisp pastry and smooth chocolate. The outside shatters lightly with each bite, while the inside stays soft and tender.
And now let dive a little deeper into why this pastry keeps people coming back for more.
The contrast between buttery laminated dough and rich chocolate creates a combination that feels both indulgent and comforting. The pastry layers puff beautifully in the oven, forming those delicate flaky sheets that give every bite its signature texture.
Add warm chocolate tucked into the center and suddenly the whole experience becomes irresistible.
A Little Story Behind This Classic Pastry
Before we move further into the kitchen, it helps to know a little bit about where this famous pastry comes from.
Chocolate croissants, often known in French bakeries as pain au chocolat, are part of the rich tradition of French viennoiserie baking. These pastries combine bread making techniques with pastry style layering, creating something that sits right between bread and dessert.
French bakers perfected laminated dough centuries ago, folding butter into dough repeatedly to create thin layers. When baked, steam forms between those layers and produces the light flaky structure that people adore today.
And honestly, once you taste it fresh from your own oven, you will understand why this pastry became a bakery legend.
Why This Recipe Works So Well Every Time
Baking laminated pastry may sound intimidating, but this approach keeps things simple and reliable. Let me tell you, it’s worth every bite.
Versatile: You can enjoy these pastries for breakfast, brunch, or even as a sweet afternoon snack with coffee.
Budget-Friendly: Making them at home costs far less than buying bakery pastries.
Quick and Easy: While the dough needs resting time, the actual preparation steps are straightforward.
Customizable: You can swap chocolate types or add fillings like almond paste.
Crowd-Pleasing: Few baked goods disappear faster from a serving plate.
Make-Ahead Friendly: The dough can be prepared in advance and baked later.
Great for Leftovers: If any remain, they reheat beautifully the next day.
Smart Baker Secrets for Perfect Results
Now let’s talk about a few tricks that professional bakers rely on.
- Keep butter cold: Cold butter helps create clean layers inside the dough.
- Roll gently: Pressing too hard flattens the layers and reduces flakiness.
- Allow proper resting time: Chilled dough rolls more easily and keeps its structure.
- Use quality chocolate: Good chocolate makes a noticeable difference in flavor.
These little details might seem small, but they transform the final result.
Essential Tools for Smooth Baking
Before mixing the dough, gathering the right tools makes everything easier.
Mixing Bowl: Large enough to comfortably combine and knead the dough.
Rolling Pin: Helps flatten and laminate the dough evenly.
Baking Sheet: Provides a stable surface for baking the pastries.
Parchment Paper: Prevents sticking and makes cleanup easier.
Pastry Brush: Useful for brushing egg wash on the pastries before baking.
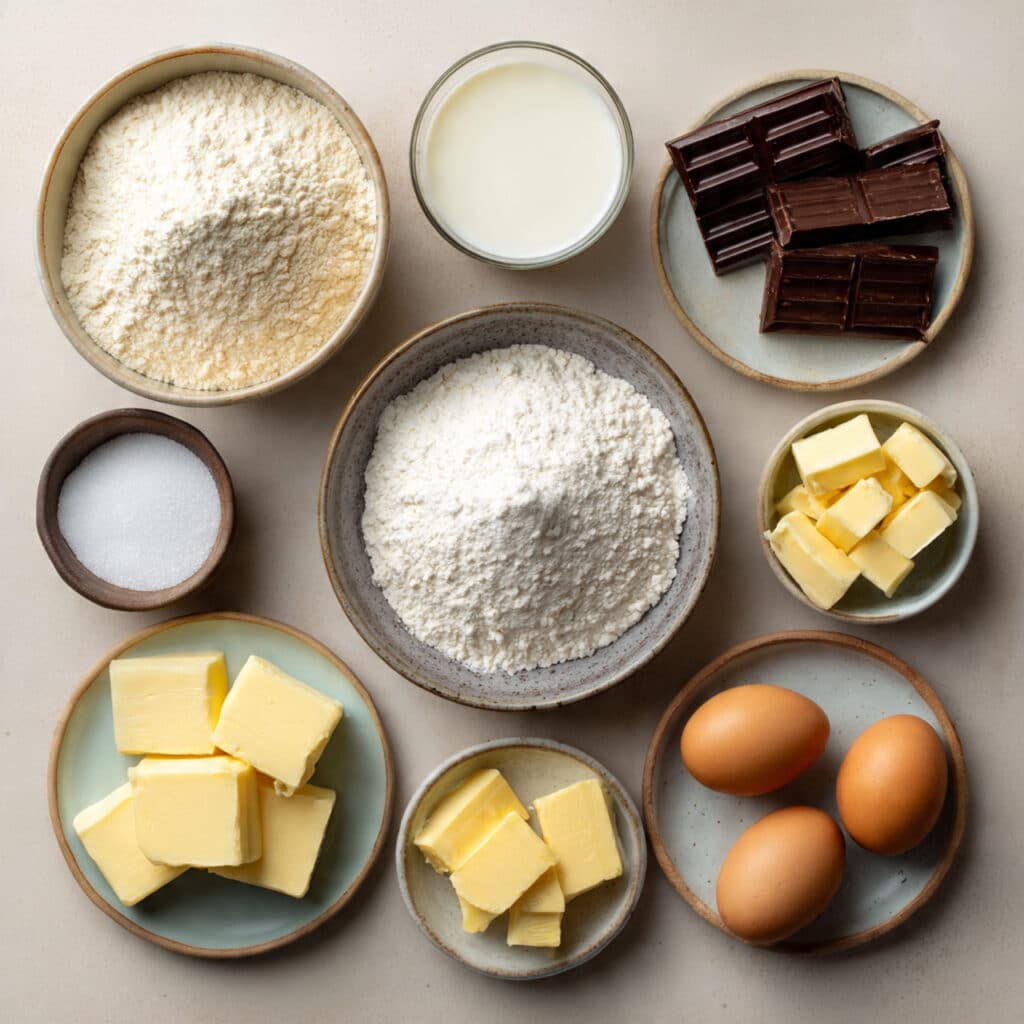
Ingredients That Build Beautiful Layers
The beauty of this pastry is that simple ingredients work together to create something remarkable.
- All Purpose Flour: 3 cups, forms the structure of the dough and creates the pastry base.
- Granulated Sugar: 2 tablespoons, adds gentle sweetness and helps the dough brown.
- Active Dry Yeast: 2 teaspoons, helps the dough rise and become airy.
- Warm Milk: 1 cup, activates the yeast and hydrates the dough.
- Unsalted Butter: 1 cup cold butter, layered into the dough to create flaky texture.
- Salt: 1 teaspoon, balances sweetness and enhances flavor.
- Eggs: 2 large eggs, one for dough richness and one for egg wash.
- Dark Chocolate Sticks: about 8 pieces, placed inside each pastry for that classic filling.
Easy Ingredient Swaps When Needed
Sometimes you might not have everything on hand, and that is perfectly fine.
Dark Chocolate: Milk chocolate or semi sweet chocolate bars work beautifully.
Milk: Plant based milk such as almond or oat milk can replace dairy milk.
All Purpose Flour: Bread flour can be used for slightly chewier pastry layers.
Spotlight on the Star Ingredients
Some ingredients truly define the final result.
Butter: The cold butter layers create the signature flaky pastry texture.
Dark Chocolate: Rich chocolate provides the smooth, slightly bittersweet center that balances the buttery dough.
Let’s Bake These Beautiful Pastries
And now the fun part begins. The kitchen will soon smell amazing.
- Preheat Your Equipment: Set the oven to 375°F (190°C) and line a baking sheet with parchment paper.
- Combine Ingredients: In a bowl mix warm milk, yeast, sugar, flour, salt, and one egg until a soft dough forms.
- Prepare Your Cooking Vessel: Roll the dough into a large rectangle and place thin slices of cold butter across the surface.
- Assemble the Dish: Fold and roll the dough several times to create layers, then cut into rectangles and place a piece of chocolate at one end before rolling into croissant shapes.
- Cook to Perfection: Place pastries on the prepared baking sheet and brush with egg wash. Bake for about 20 minutes until golden brown.
- Finishing Touches: Let the pastries cool slightly so the chocolate settles inside the flaky layers.
- Serve and Enjoy: Serve warm and watch them disappear quickly.
The Magic of Texture and Flavor
What makes these pastries so satisfying is the contrast between textures.
The outer layers bake into crisp golden sheets that shatter lightly with each bite. Inside, the pastry stays soft and tender while melted chocolate adds creamy richness. The butter aroma fills the kitchen, while the chocolate offers deep sweetness that balances the pastry perfectly.
Helpful Baking Tips for Success
A few helpful tricks can make your baking experience smoother.
- Chill the dough between folds to keep the butter from melting.
- Roll the dough evenly to maintain consistent layers.
- Leave space between pastries on the baking tray so they expand properly.
Mistakes to Avoid for Perfect Pastry
Even experienced bakers run into small challenges sometimes.
- Overworking the dough can make the pastry tough instead of flaky.
- Warm butter can melt into the dough rather than forming layers.
- Skipping resting time makes the dough difficult to roll.
Nutritional Snapshot
Servings: 8 pastries
Calories per serving: 320
Note: These are approximate values.
Preparation Timeline at a Glance
Prep Time: 40 minutes
Cook Time: 20 minutes
Total Time: 1 hour
Make Ahead and Storage Tips
If you want to plan ahead, this pastry dough handles preparation very well.
The shaped pastries can be refrigerated overnight before baking. Simply bake them fresh in the morning for a warm breakfast treat.
Once baked, store leftovers in an airtight container at room temperature for up to two days. Reheat in the oven for a few minutes to bring back the crisp layers.
For longer storage, freeze unbaked pastries and bake directly from frozen with a few extra minutes added.
Serving Ideas That Make It Extra Special
Serve these pastries warm alongside fresh fruit and a cup of coffee for a café style breakfast.
They also pair wonderfully with hot chocolate, tea, or even a light yogurt parfait for a balanced brunch plate.
Fun Ways to Reinvent Leftovers
If you somehow have extras, here are a few creative ideas.
Slice pastries and toast them lightly for a crispy dessert.
Turn them into a simple bread pudding by baking pieces with custard.
Or crumble them over vanilla yogurt for a quick sweet breakfast.
Extra Tips for the Best Baking Experience
Keep ingredients chilled whenever possible, especially the butter.
Work on a lightly floured surface to prevent sticking.
And most importantly, enjoy the process because baking pastries can be incredibly satisfying.
Turn Your Pastries into a Showstopper
Presentation makes these pastries feel even more special.
Arrange them on a simple platter, dust lightly with powdered sugar, and serve with small bowls of chocolate spread or fruit jam. The golden layers will already look impressive, but a little garnish adds that bakery style finish.
Delicious Variations to Explore
Here are a few ways to change things up once you master the basic method.
Almond Version: Add almond paste before rolling the dough.
Hazelnut Filling: Replace chocolate with hazelnut spread.
White Chocolate Twist: Use white chocolate for a sweeter pastry.
Berry Addition: Add thin slices of strawberry along with chocolate.
FAQ’s
1. Can I use store bought dough instead?
Yes, puff pastry can be used for a quicker version, although homemade dough creates better layers.
2. Can these pastries be frozen?
Absolutely. Freeze before baking and bake straight from frozen.
3. Why did my pastry lose its layers?
This usually happens when butter becomes too warm during rolling.
4. What chocolate works best?
Dark chocolate sticks or bars with at least 60 percent cocoa work beautifully.
5. Can I make them smaller?
Yes, simply cut smaller rectangles before rolling.
6. Do I need special equipment?
No special tools are required beyond basic baking equipment.
7. How do I keep them flaky?
Keep the dough cold and avoid over handling.
8. Can I add nuts?
Yes, chopped almonds or hazelnuts work well inside the pastry.
9. Can I make the dough the night before?
Yes, chilling the dough overnight actually improves flavor.
10. Why is my pastry pale?
Brushing with egg wash helps create a golden finish.
Conclusion
Freshly baked chocolate croissants are one of those treats that feel luxurious but surprisingly achievable at home. With buttery layers, rich chocolate, and a golden crisp finish, every bite feels like something from a bakery window.
Take your time with the dough, enjoy the process, and soon your kitchen will be filled with the aroma of warm pastry and melted chocolate. Trust me, once you make these at home, you may never want store bought pastries again.
Print
Chocolate Croissants Recipe
- Total Time: 1 hour
- Yield: 8 pastries
- Diet: Vegetarian
Description
Flaky, buttery pastries filled with rich melted dark chocolate. These homemade chocolate croissants bake into golden layers with a crisp exterior and soft, chocolatey center, perfect for breakfast or a sweet treat.
Ingredients
- 3 cups all purpose flour
- 2 tablespoons granulated sugar
- 2 teaspoons active dry yeast
- 1 cup warm milk
- 1 cup cold unsalted butter
- 1 teaspoon salt
- 2 large eggs
- 8 dark chocolate sticks
Instructions
- Preheat the oven to 375°F (190°C) and line a baking sheet with parchment paper.
- In a mixing bowl combine warm milk, yeast, sugar, flour, salt, and one egg. Mix until a soft dough forms.
- Roll the dough into a large rectangle on a lightly floured surface.
- Place thin slices of cold butter evenly across the dough and fold the dough over the butter.
- Roll and fold the dough several times to create laminated layers.
- Cut the dough into rectangles and place a dark chocolate stick near one edge.
- Roll each rectangle into a croissant shape with the chocolate tucked inside.
- Place pastries on the prepared baking sheet and brush the tops with the remaining beaten egg.
- Bake for about 20 minutes or until the pastries are golden brown and flaky.
- Allow to cool slightly before serving so the chocolate settles inside the pastry.
Notes
- Keep the butter cold to maintain distinct flaky layers.
- Chill the dough between folds if it becomes too soft.
- Use high quality dark chocolate for the best flavor.
- Pastries can be prepared ahead and refrigerated overnight before baking.
- Prep Time: 40 minutes
- Cook Time: 20 minutes
- Category: Breakfast
- Method: Baking
- Cuisine: French
Nutrition
- Serving Size: 1 croissant
- Calories: 320
- Sugar: 10g
- Sodium: 210mg
- Fat: 18g
- Saturated Fat: 11g
- Unsaturated Fat: 6g
- Trans Fat: 0g
- Carbohydrates: 34g
- Fiber: 2g
- Protein: 6g
- Cholesterol: 55mg