Caramelized Onions For Steak, Burgers, Sides
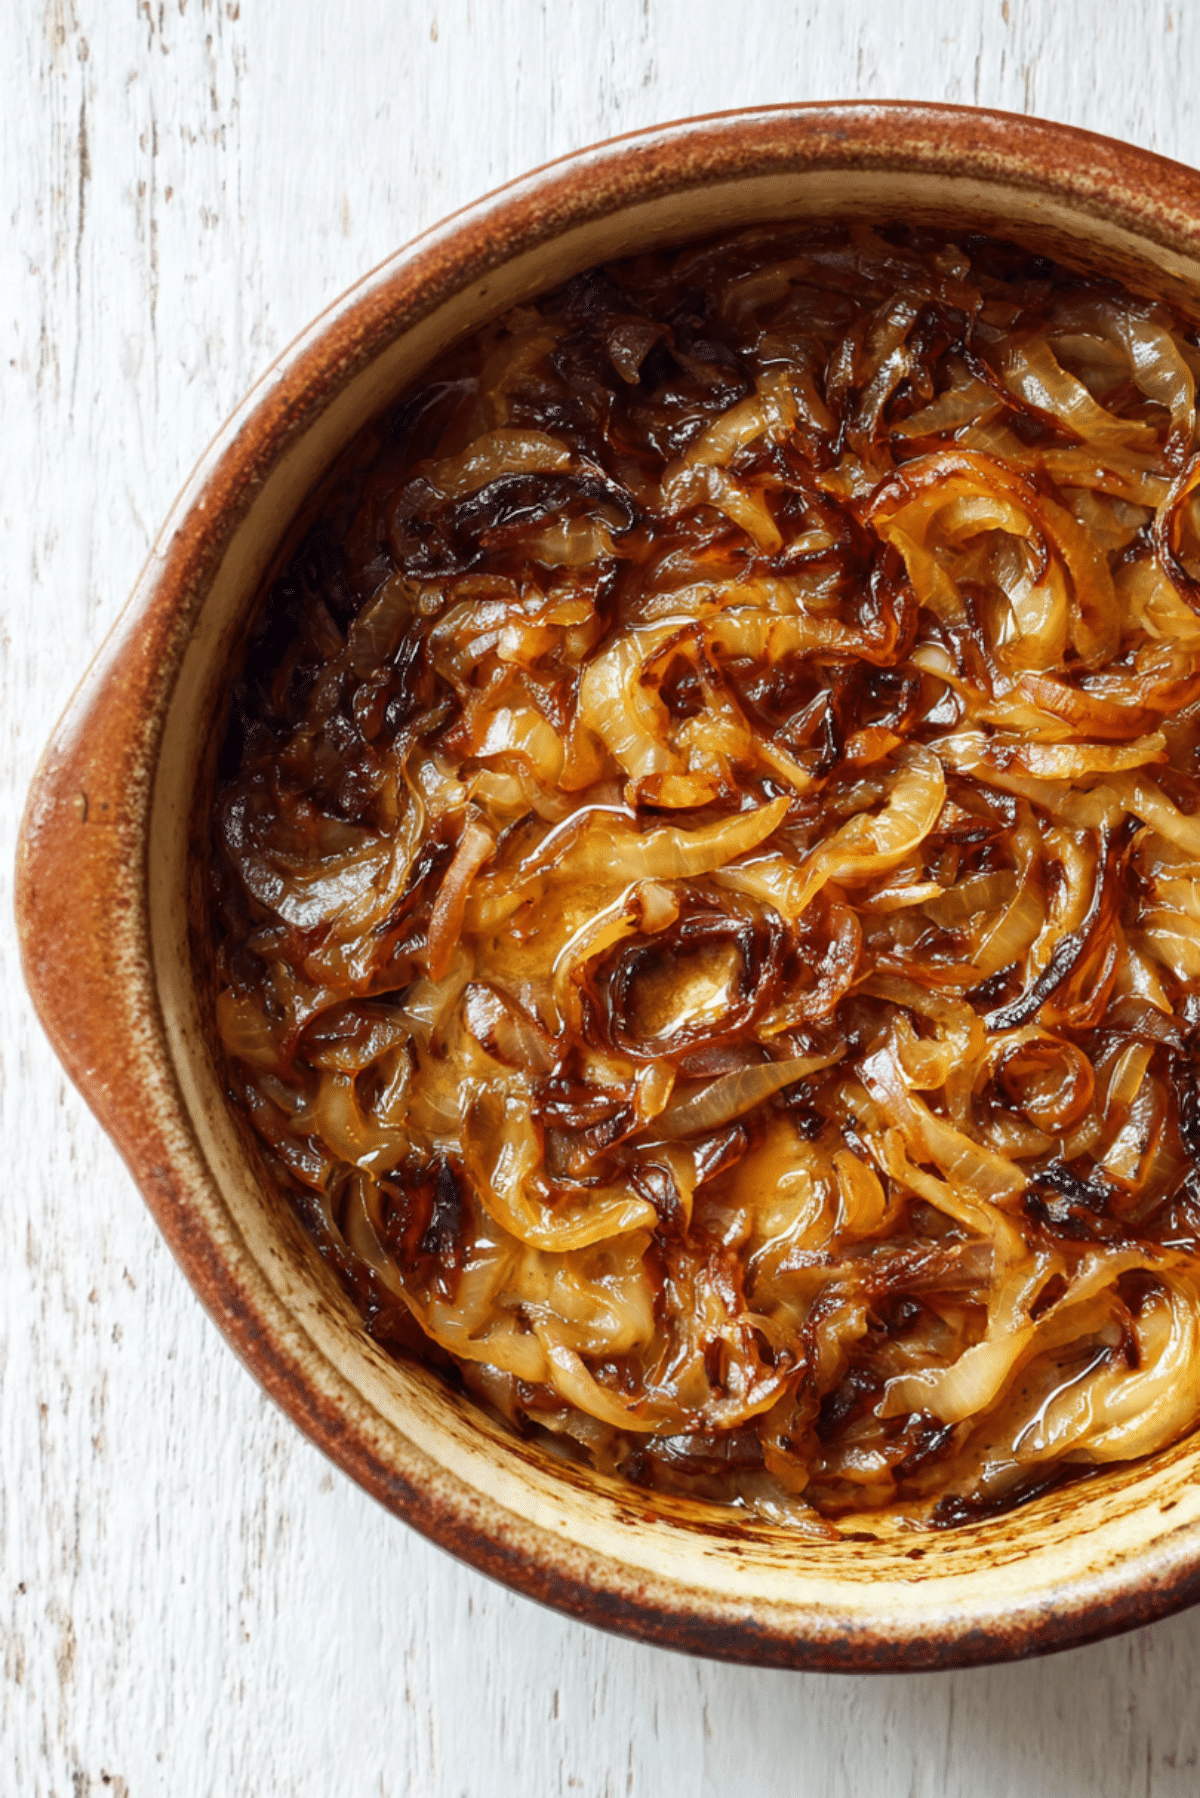
There’s something magical about a pan of caramelized onions. Slowly transformed from sharp and crunchy to sweet, jammy, and golden, they bring out the kind of deep flavor that makes anything they touch feel gourmet. Whether piled onto a juicy burger, spooned over a sizzling steak, or stirred into a cozy side dish, these rich and tender onions are pure comfort with every bite.
Behind the Recipe
The idea for this recipe came from a Sunday backyard barbecue. We had grilled steaks, burgers, and a few veggie sides ready to go, but something felt missing. I grabbed a few onions, tossed them into a pan with a bit of oil and butter, and just let them do their thing. The result was so irresistible that everyone kept asking for more. That lazy, aromatic afternoon inspired this go-to recipe.
Recipe Origin or Trivia
Caramelized onions are a culinary staple found across many cuisines. From French onion soup to Indian curries, slow-cooked onions have been used for centuries to create deep, savory-sweet foundations. In French cooking, they are famously used in onion tarts and stews, while in American kitchens, they’re often used to elevate sandwiches and grilled meats. The magic lies in patience, letting the natural sugars in the onion do all the work.
Why You’ll Love Caramelized Onions For Steak, Burgers, Sides
These onions aren’t just a topping. They’re a secret weapon in your kitchen. Here’s why they’ll become your favorite flavor boost:
Versatile: Perfect for burgers, steaks, pizzas, sandwiches, and even stirred into mashed potatoes.
Budget-Friendly: Uses simple pantry staples like onions, oil, and a touch of sugar.
Quick and Easy: Most of the work is just letting them slowly cook while you relax or prep other dishes.
Customizable: You can adjust sweetness, salt, and even try different onion varieties.
Crowd-Pleasing: They add irresistible richness and depth that everyone loves.
Make-Ahead Friendly: Store well in the fridge and reheat beautifully.
Great for Leftovers: Transform yesterday’s meal with a spoonful of these onions on top.
Chef’s Pro Tips for Perfect Results
To get that deep, sweet flavor and soft texture, a few tricks go a long way.
- Low and Slow: Don’t rush the cooking. Keep the heat low so the onions soften and brown gradually without burning.
- Use a Wide Pan: A wide surface allows more onions to contact the pan, which helps them brown evenly.
- Mix Oil and Butter: Oil prevents burning while butter adds a rich, nutty flavor.
- Deglaze if Needed: If brown bits stick to the pan, splash a bit of water to release all that flavor.
- Stir Occasionally: Don’t over-stir. Let them sit and brown, but check every few minutes.
Kitchen Tools You’ll Need
You only need a few basic tools to get started:
Heavy Skillet: Cast iron or stainless steel is best for even browning.
Sharp Knife: To slice the onions thinly and evenly.
Cutting Board: A stable board makes slicing safer and easier.
Wooden Spoon or Silicone Spatula: For gentle stirring.
Ingredients in Caramelized Onions For Steak, Burgers, Sides
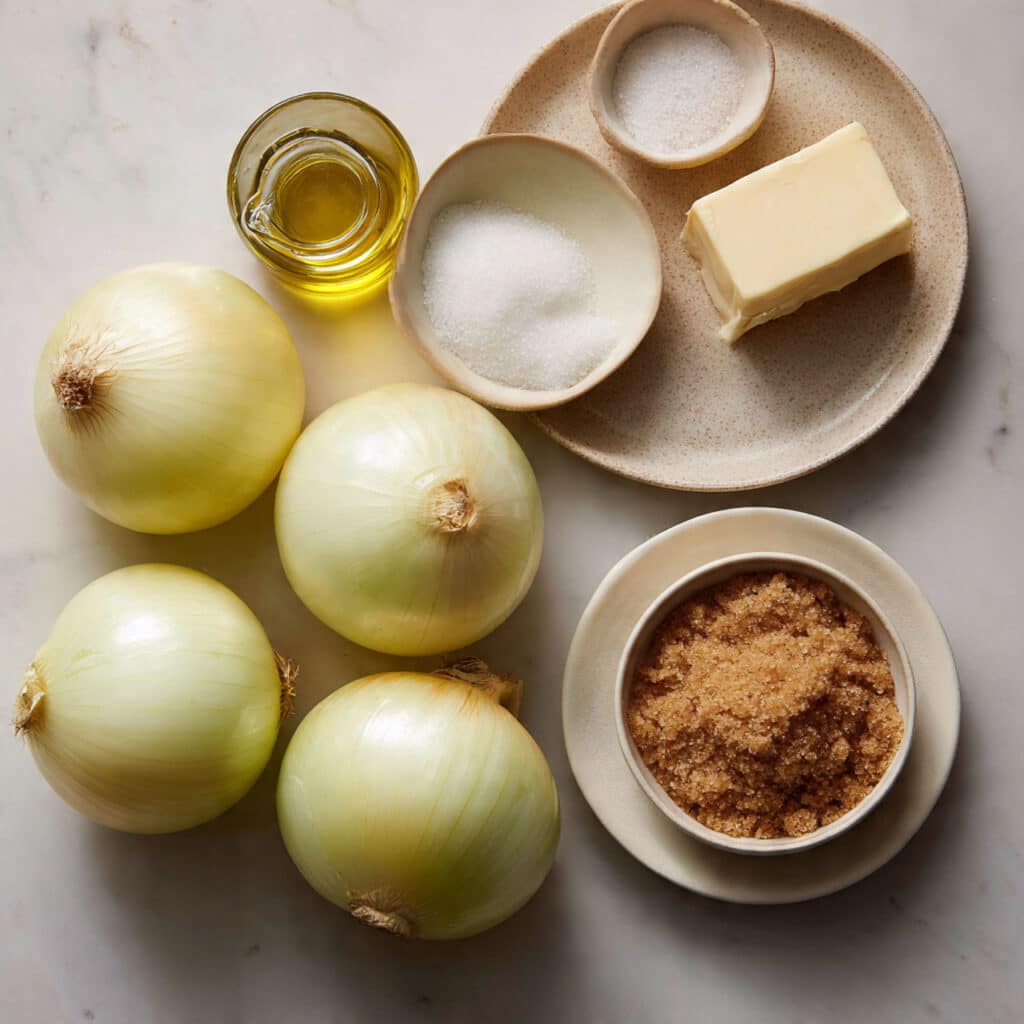
This recipe leans into simple pantry ingredients that shine when combined with time and care.
- Yellow Onions: 3 large onions, thinly sliced. They are naturally sweet and perfect for caramelizing.
- Olive Oil: 2 tablespoons. Helps prevent burning and keeps the onions from sticking.
- Butter: 2 tablespoons. Adds a rich, savory note and smooth texture.
- Kosher Salt: 1 teaspoon. Enhances sweetness and balances the flavors.
- Brown Sugar: 1 teaspoon (optional). Helps boost sweetness and deepen color.
Ingredient Substitutions
Feel free to make these swaps if needed:
Yellow Onions: Red or white onions can be used, though sweetness and flavor may vary.
Olive Oil: Use avocado oil or canola oil as alternatives.
Butter: Try ghee or dairy-free butter for a similar richness.
Brown Sugar: Maple syrup or honey can give a similar sweet note.
Kosher Salt: Sea salt works just as well.
Ingredient Spotlight
Yellow Onions: These are the go-to for caramelizing thanks to their natural balance of sweetness and sharpness. Once cooked down, they turn golden and melt-in-your-mouth tender.
Brown Sugar: Just a touch brings out the onions’ sweetness and gives them that deep, golden hue.
Instructions for Making Caramelized Onions For Steak, Burgers, Sides
Let’s dive into the slow-cooked magic of caramelized onions. These steps are simple, but the flavors are anything but.
- Preheat Your Equipment:
Place your skillet over low heat and let it warm gently for a minute or two. - Combine Ingredients:
Add olive oil and butter to the pan. Once melted, add the sliced onions and sprinkle with salt. - Prepare Your Cooking Vessel:
Make sure your pan is large enough to give the onions space. A wide surface helps them brown more evenly. - Assemble the Dish:
Spread the onions out evenly in the pan. Let them sit undisturbed for a few minutes to begin browning. - Cook to Perfection:
Continue cooking over low heat for 30 to 40 minutes, stirring every few minutes. If the onions start to dry or stick, add a splash of water. Add brown sugar in the last 10 minutes if desired. - Finishing Touches:
Once the onions are soft, golden, and sweet, remove from heat. Let cool slightly before serving. - Serve and Enjoy:
Pile them on steaks, burgers, sides, or store for later use. Trust me, they’ll go fast.
Texture & Flavor Secrets
As the onions cook down, their sharp bite melts into a mellow sweetness. The edges turn slightly crispy while the center becomes silky and tender. The butter brings a savory richness, while the slow browning adds complexity that you just can’t fake. Every spoonful is golden, jammy, and packed with deep flavor.
Cooking Tips & Tricks
Here are a few tips to make the process smoother and more flavorful:
- Stir occasionally but let them sit to develop browning.
- Slice onions evenly so they cook at the same rate.
- If your pan dries out, a splash of water or broth helps prevent burning.
- A pinch of baking soda can speed up caramelization, but use sparingly.
What to Avoid
Keep an eye out for these common missteps:
- Burning the onions by turning up the heat too high.
- Stirring constantly, which prevents browning.
- Using too little fat, which can cause sticking and uneven cooking.
- Overcrowding the pan, which leads to steaming instead of caramelizing.
Nutrition Facts
Servings: 6
Calories per serving: 95
Note: These are approximate values.
Preparation Time
Prep Time: 10 minutes
Cook Time: 40 minutes
Total Time: 50 minutes
Make-Ahead and Storage Tips
The beauty of caramelized onions is how well they store. You can easily make a big batch and keep them on hand all week. Let them cool completely, then store in an airtight container in the fridge for up to 5 days. They also freeze well. Reheat gently in a skillet or microwave before serving.
How to Serve Caramelized Onions For Steak, Burgers, Sides
Here’s where things get fun. These onions are the ultimate flavor booster. Try them:
- On top of a sizzling grilled steak or juicy burger
- Stirred into mashed potatoes or creamy risotto
- Layered into sandwiches, wraps, or quesadillas
- Tossed into warm grain bowls or roasted veggie sides
Creative Leftover Transformations
Got extra? Here’s how to reinvent them:
- Mix into scrambled eggs or omelets
- Stir into pasta with a bit of cream or stock
- Use as a pizza topping with goat cheese or arugula
- Blend into dips for a sweet, savory kick
Additional Tips
- Keep a small jar of these onions in your fridge as a flavor bomb.
- Let them cool before storing so they don’t steam and lose texture.
- Don’t skip the salt — it enhances every other flavor.
Make It a Showstopper
To really wow your guests or social feed, serve your caramelized onions in a rustic cast iron skillet with a sprig of thyme on the side. Add a drizzle of olive oil for shine and serve with crusty bread or alongside a perfectly grilled steak.
Variations to Try
- Balsamic Caramelized Onions: Add a splash of balsamic vinegar at the end for tangy depth.
- Garlic Caramelized Onions: Stir in minced garlic during the last 10 minutes.
- Herbed Version: Add thyme or rosemary while cooking for earthy notes.
- Sweet and Spicy: Toss in a pinch of chili flakes and a dab of honey.
- Onion Medley: Mix yellow, red, and sweet onions for complex flavor.
FAQ’s
Q1: Can I use red onions instead of yellow?
Yes, red onions will work, though they’ll have a slightly sharper bite and may not caramelize as sweetly.
Q2: How do I know when the onions are done?
They should be soft, jammy, and golden brown with a rich aroma.
Q3: Can I make these ahead of time?
Absolutely. They store well and taste even better after resting.
Q4: Why do my onions burn instead of caramelize?
You may be using too high heat. Keep it low and stir gently.
Q5: Do I have to add sugar?
No, the onions naturally sweeten as they cook. Sugar is just optional for a boost.
Q6: How should I slice the onions?
Thin, even slices are best. A mandoline or sharp knife works great.
Q7: Can I freeze caramelized onions?
Yes, freeze in portions and reheat when needed.
Q8: Is it okay to cook a big batch?
Yes, just use a larger pan and stir a bit more often.
Q9: What dishes pair best with them?
Grilled meats, sandwiches, grain bowls, pasta, even savory tarts.
Q10: Can I use sweet onions?
Yes, they’ll caramelize faster and be even sweeter.
Conclusion
Caramelized onions are a kitchen classic for a reason. They’re simple, deeply flavorful, and endlessly useful. Once you master the slow-cooking technique, you’ll find yourself reaching for them again and again. Trust me, they’re worth every minute and every bite.
Print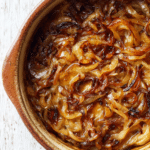
Caramelized Onions For Steak, Burgers, Sides
- Total Time: 50 minutes
- Yield: 6 servings
- Diet: Vegetarian
Description
These golden, jammy caramelized onions are the perfect topping for steak, burgers, and sides. Slowly cooked to bring out their natural sweetness, they’re rich, savory, and impossible to resist.
Ingredients
- 3 large yellow onions, thinly sliced
- 2 tablespoons olive oil
- 2 tablespoons butter
- 1 teaspoon kosher salt
- 1 teaspoon brown sugar (optional)
Instructions
- Place a skillet over low heat and allow it to warm gently.
- Add olive oil and butter. Once melted, stir in the sliced onions and salt.
- Spread the onions evenly across the pan and let them sit for a few minutes to start browning.
- Cook the onions for 30 to 40 minutes, stirring occasionally. If they start to stick, add a splash of water.
- In the last 10 minutes, stir in brown sugar if using, and continue cooking until deeply golden and soft.
- Remove from heat and allow to cool slightly before serving.
Notes
- Use a wide pan for more even browning.
- Stir occasionally, but allow the onions to sit and develop color.
- A splash of balsamic vinegar adds a tangy twist at the end.
- Prep Time: 10 minutes
- Cook Time: 40 minutes
- Category: Toppings and Sides
- Method: Stovetop
- Cuisine: American
Nutrition
- Serving Size: 1 serving
- Calories: 95
- Sugar: 3g
- Sodium: 220mg
- Fat: 7g
- Saturated Fat: 3g
- Unsaturated Fat: 4g
- Trans Fat: 0g
- Carbohydrates: 9g
- Fiber: 1g
- Protein: 1g
- Cholesterol: 10mg