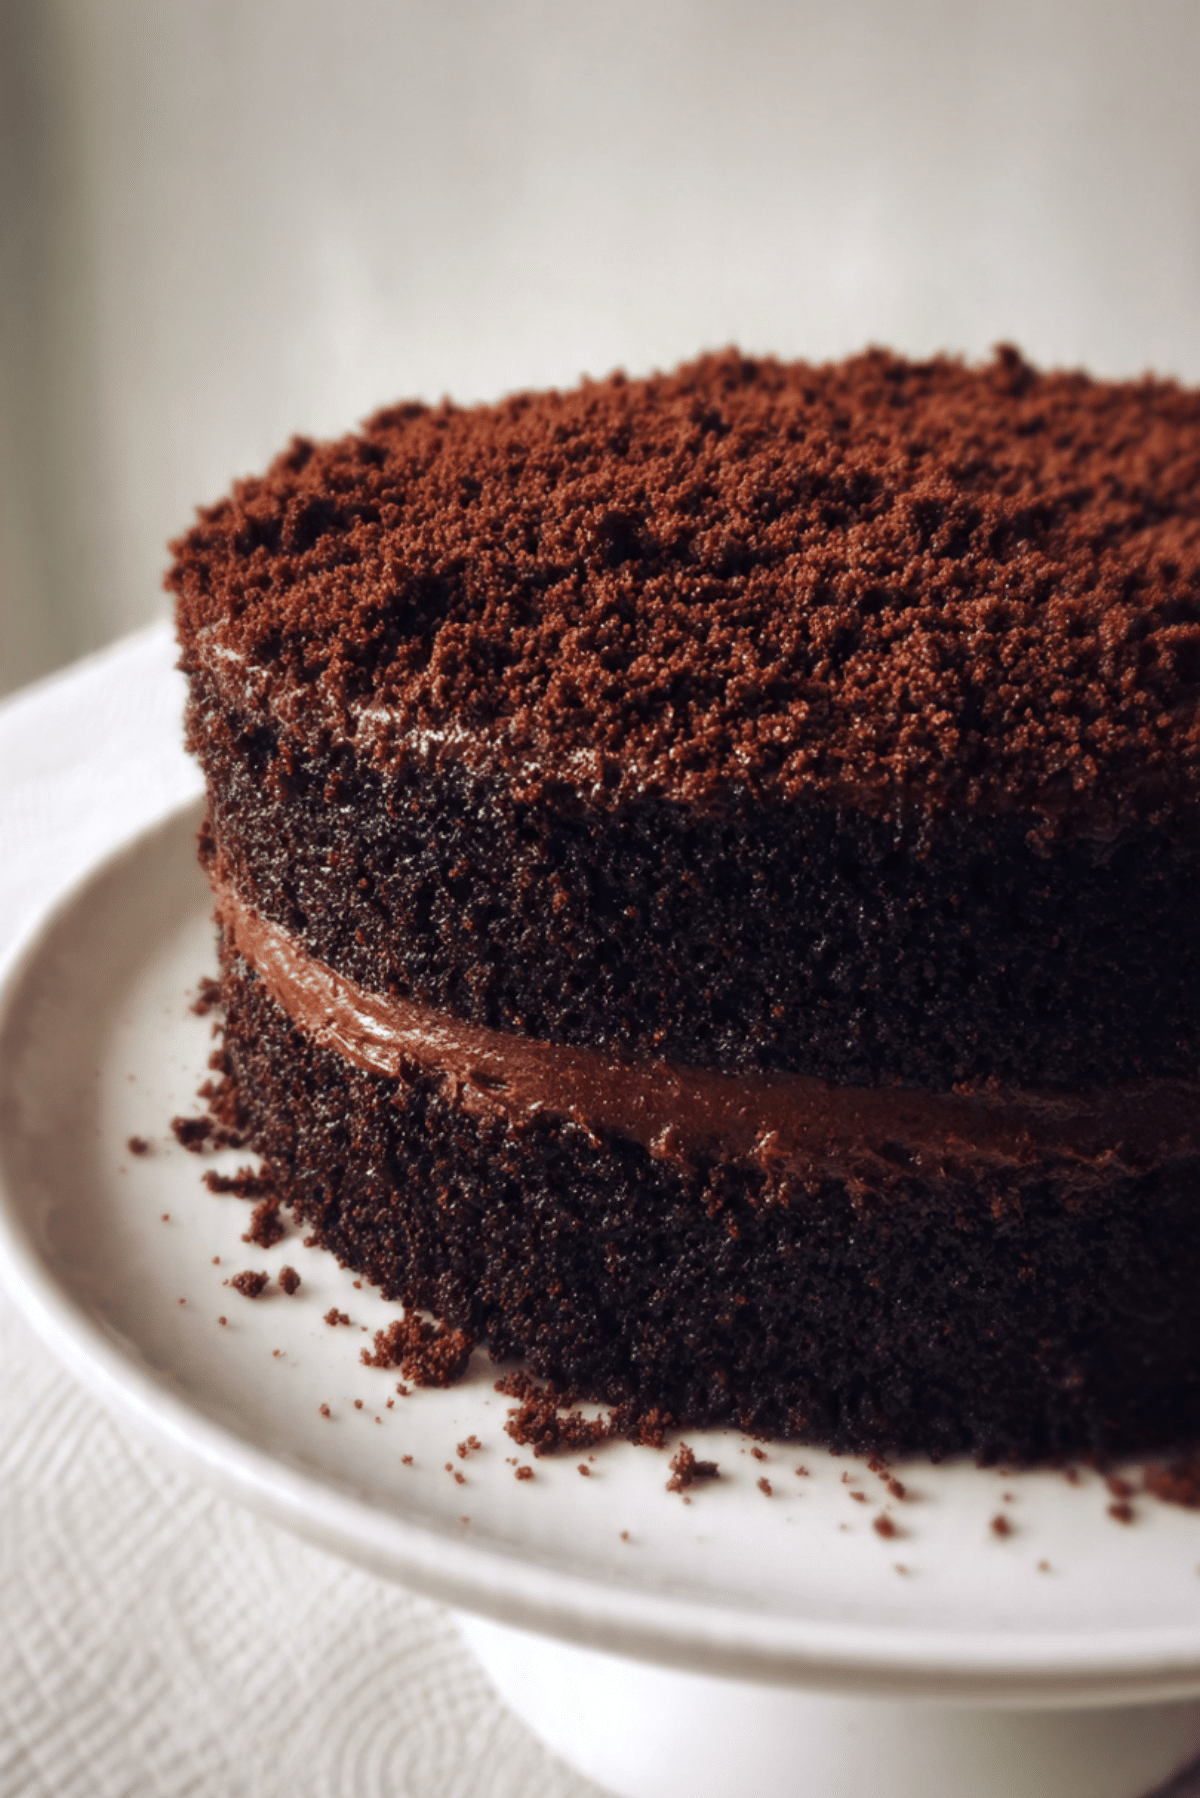
Blackout Chocolate Cake
There are chocolate cakes, and then there’s Blackout Chocolate Cake. Rich, deep, and unapologetically decadent, this dessert is for true chocolate lovers who crave something intense, luscious, and unforgettable. With layers of moist chocolate cake, silky pudding, and a final coat of chocolate crumbs, every bite feels like diving into a sea of chocolatey goodness. Trust me, this one’s worth every bite.
Behind the Recipe
This cake has a story that’s just as rich as its flavor. I first came across it during a cozy winter trip in New York, tucked away in a vintage bakery that smelled like cocoa and childhood dreams. One forkful later, I was hooked. Since then, I’ve spent years recreating it in my own kitchen, perfecting that balance of softness, fudginess, and deep cocoa flavor. It’s now my go-to showstopper whenever I want to impress or indulge.
Recipe Origin or Trivia
Blackout Chocolate Cake has roots in Brooklyn, famously associated with the now-defunct Ebinger’s Bakery. It earned the name “Blackout” not just because of its dark, dramatic color, but also as a nod to the World War II blackouts. The cake became iconic for its triple chocolate layers and crumbly topping made from the cake itself. Today, it remains a nostalgic favorite that delivers pure chocolate satisfaction.
Why You’ll Love Blackout Chocolate Cake
Let’s be honest, this isn’t your average cake. Here’s why it will steal your heart:
Versatile: Perfect for birthdays, dinner parties, or a casual treat with coffee.
Budget-Friendly: Uses pantry staples like cocoa, sugar, and flour without fancy ingredients.
Quick and Easy: No complicated steps, just straightforward mixing and layering.
Customizable: Add chocolate chips or espresso for extra depth.
Crowd-Pleasing: Everyone loves chocolate, and this one satisfies all cravings.
Make-Ahead Friendly: You can bake the layers and pudding a day in advance.
Great for Leftovers: Stores beautifully and somehow tastes even better the next day.
Chef’s Pro Tips for Perfect Results
Want to make your cake sing with flavor and texture? Here are a few secrets from my kitchen:
- Use Dutch-process cocoa for a deeper, smoother chocolate flavor.
- Let the cake cool completely before assembling, so the pudding doesn’t melt into it.
- Chill the pudding until very thick for easy spreading between layers.
- For the crumb topping, freeze one cake layer slightly before crumbling it for a neater look.
- Don’t skip the hot coffee in the batter. It intensifies the cocoa and makes the cake ultra-moist.
Kitchen Tools You’ll Need
To make the magic happen, gather these essentials:
Mixing Bowls: For combining dry and wet ingredients separately.
Electric Mixer: Speeds up mixing and ensures smooth batter.
Saucepan: Needed for cooking the chocolate pudding.
Cake Pans: Two 9-inch round pans work best for even layers.
Offset Spatula: For smoothing pudding and frosting.
Wire Rack: For cooling the cake layers evenly.
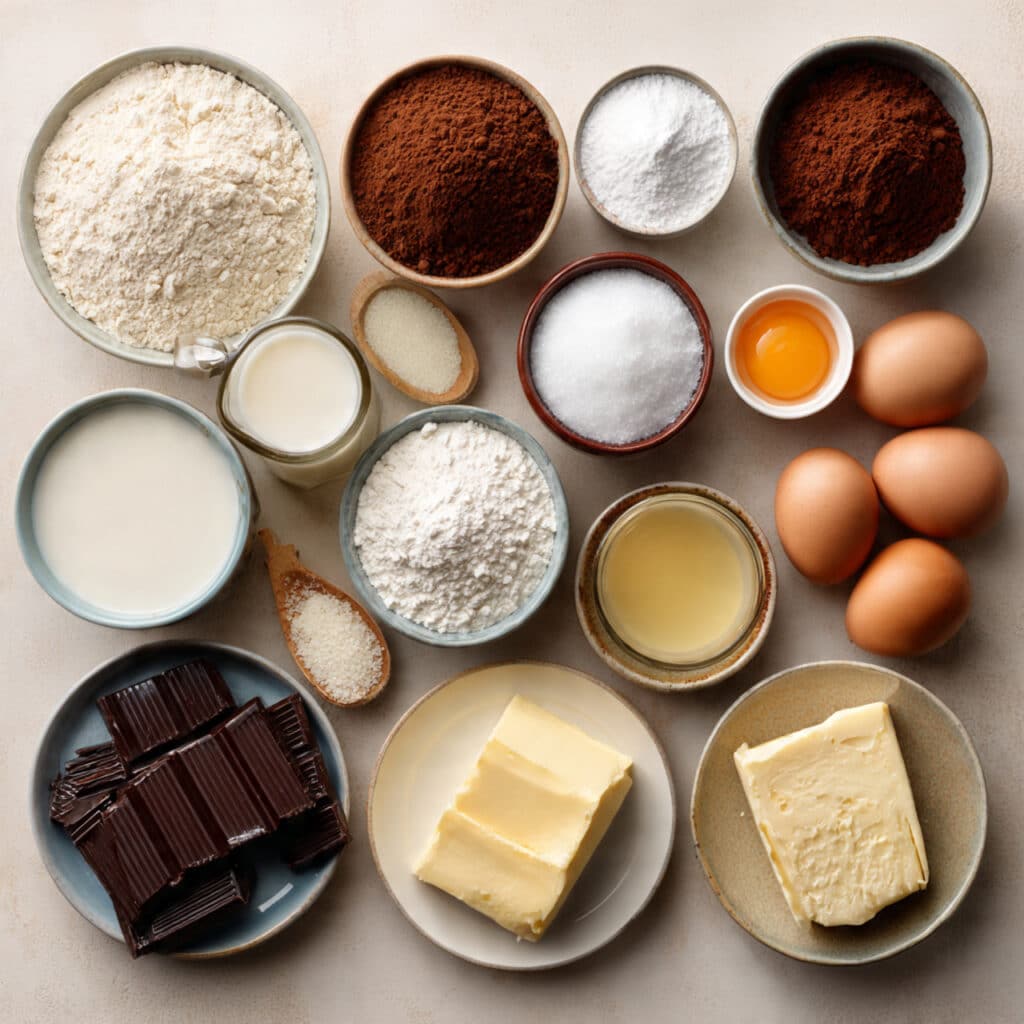
Ingredients in Blackout Chocolate Cake
Every element of this cake has a job to do, working together for ultimate indulgence.
- All-Purpose Flour: 1¾ cups. Provides structure and body to the cake layers.
- Unsweetened Cocoa Powder: ¾ cup. Delivers that bold, chocolatey punch.
- Baking Powder: 1½ teaspoons. Helps the cake rise to fluffy heights.
- Baking Soda: 1½ teaspoons. Balances acidity and aids in rising.
- Salt: ½ teaspoon. Enhances all the chocolate notes.
- Granulated Sugar: 1 cup. Sweetens and adds moisture.
- Light Brown Sugar: ½ cup. Brings a hint of molasses depth.
- Large Eggs: 2. Help bind everything and add richness.
- Buttermilk: 1 cup. Keeps the cake tender and tangy.
- Vegetable Oil: ½ cup. Adds moisture and keeps things soft.
- Pure Vanilla Extract: 2 teaspoons. Rounds out the chocolate flavor.
- Hot Coffee: 1 cup. Intensifies the cocoa and moistens the batter.
- Unsalted Butter: 4 tablespoons. For the pudding, adds richness.
- Cornstarch: ¼ cup. Thickens the pudding to the perfect consistency.
- Whole Milk: 2½ cups. Makes the pudding creamy and smooth.
- Semi-Sweet Chocolate: 6 ounces, chopped. Melts into the pudding for luscious texture.
- Dark Chocolate: 2 ounces, chopped. Adds bitterness and depth to balance sweetness.
- Powdered Sugar: ½ cup. Optional, for dusting or sweetening the pudding if desired.
Ingredient Substitutions
Everyone’s pantry is different, and here’s how you can tweak things:
Buttermilk: Use 1 cup milk + 1 tablespoon vinegar or lemon juice.
Vegetable Oil: Swap with canola oil or melted coconut oil.
Coffee: Use hot water if preferred, but you’ll lose some flavor richness.
Semi-Sweet Chocolate: Milk chocolate for sweeter, bittersweet for darker.
Brown Sugar: Replace with all white sugar if needed, though it will lose some depth.
Ingredient Spotlight
Cocoa Powder: Choose a high-quality Dutch-process cocoa for intense flavor and dark color. It’s the star of the show here.
Cornstarch: Essential for that glossy, thick pudding that doesn’t ooze out of the layers. Without it, your cake will be a mess.
Instructions for Making Blackout Chocolate Cake
This cake is a process, but a joyful one. Here’s how you bring it to life:
- Preheat Your Equipment:
Preheat your oven to 350°F (175°C) and grease two 9-inch round cake pans. Line with parchment paper for easy release. - Combine Ingredients:
In one bowl, whisk together flour, cocoa powder, baking powder, baking soda, salt, granulated sugar, and brown sugar. In another, whisk eggs, buttermilk, oil, and vanilla. Slowly mix in the dry ingredients, then stir in the hot coffee. - Prepare Your Cooking Vessel:
Divide the batter evenly between the two pans. Tap to release air bubbles. - Assemble the Dish:
Bake for 30–35 minutes or until a toothpick comes out clean. Let cool completely on a wire rack. While cooling, make the pudding by heating milk, sugar, and cornstarch in a saucepan until thickened. Stir in butter and chopped chocolates until melted and smooth. Chill pudding until set. - Cook to Perfection:
Once everything is cooled, slice one cake layer in half horizontally. Use the second layer to crumble into fine crumbs. - Finishing Touches:
Layer cake, pudding, cake, pudding, and then coat the entire cake with pudding and press chocolate cake crumbs all over the surface. - Serve and Enjoy:
Chill for at least an hour before slicing. Serve cold or at room temperature for a melt-in-your-mouth experience.
Texture & Flavor Secrets
The beauty of this cake lies in contrast. You get the soft, moist crumb of the chocolate cake, the thick, creamy pudding nestled between layers, and a light crunch from the crumb coating. The deep cocoa notes are balanced by sweetness and just a whisper of bitterness from the dark chocolate.
Cooking Tips & Tricks
Every baker needs a few tricks up their sleeve:
- Always use room temperature eggs and buttermilk for better mixing.
- Don’t overbake the layers, or they’ll lose that plush texture.
- Chill the pudding for at least 1 hour to firm it up before spreading.
- For neater layers, use a serrated knife to slice the cake.
What to Avoid
It’s easy to make little mistakes, but here’s how to sidestep them:
- Don’t skip the parchment paper: It guarantees easy cake removal.
- Avoid hot pudding on warm cake: It will turn into a gooey mess.
- Don’t rush the chilling: The crumb layer needs a cold surface to stick properly.
Nutrition Facts
Servings: 12
Calories per serving: 480
Note: These are approximate values.
Preparation Time
Prep Time: 30 minutes
Cook Time: 35 minutes
Total Time: 1 hour 5 minutes
Make-Ahead and Storage Tips
You can absolutely make this cake ahead of time. The cake layers can be baked a day early and wrapped tightly. The pudding can be made and chilled overnight. Once assembled, the cake stores beautifully in the fridge for up to 4 days. You can also freeze the cake layers for up to a month. Thaw overnight before assembling.
How to Serve Blackout Chocolate Cake
Slice thick, generous wedges and serve on their own or with a scoop of vanilla ice cream. A drizzle of warm chocolate sauce or a sprinkle of cocoa powder can take it even further. Pairs beautifully with espresso or a glass of cold milk.
Creative Leftover Transformations
Got leftovers? Turn them into magic:
- Chocolate cake parfaits layered with whipped cream.
- Cake pops made by mixing crumbs with frosting and dipping in chocolate.
- Ice cream mix-ins for homemade chocolate swirl.
Additional Tips
Want to take it even further?
- Let the cake sit out 15 minutes before serving for a softer texture.
- Use a warm knife to slice cleanly through chilled layers.
- For extra richness, stir in a splash of milk chocolate into the pudding.
Make It a Showstopper
Presentation matters. Sprinkle extra cake crumbs on the serving plate for drama. Garnish with chocolate curls or a dusting of powdered sugar. Serve on a dark cake stand for contrast that makes it pop in photos.
Variations to Try
- Peanut Butter Pudding: Replace some chocolate in the pudding with creamy peanut butter.
- Mint-Chocolate Twist: Add peppermint extract to the pudding for a cool surprise.
- Espresso Boost: Add espresso powder to the batter and pudding for mocha depth.
- Salted Caramel Drip: Drizzle the top with caramel and sea salt.
- Layered Sheet Cake: Use a rectangular pan and stack layers horizontally for a different look.
FAQ’s
Q1: Can I make this gluten-free?
A1: Yes, use a 1:1 gluten-free baking flour blend for best results.
Q2: Do I have to use coffee?
A2: No, you can substitute hot water, but coffee enhances the chocolate flavor.
Q3: Can I freeze the whole cake?
A3: Yes, wrap tightly and freeze for up to 1 month. Thaw overnight in the fridge.
Q4: Can I use instant pudding instead?
A4: You could, but homemade gives the best flavor and texture.
Q5: Is it better the next day?
A5: Absolutely, the flavors meld and it cuts even cleaner.
Q6: What type of chocolate is best?
A6: Use high-quality semi-sweet and dark chocolate bars, not chips.
Q7: Can I use a different size pan?
A7: Yes, just adjust baking times accordingly.
Q8: How do I keep the crumbs from falling off?
A8: Chill the cake before applying crumbs, and press them in gently.
Q9: Can I add nuts?
A9: Sure, chopped walnuts or pecans make a great crunchy layer.
Q10: Is this cake kid-friendly?
A10: Totally, just use water instead of coffee and they’ll love it.
Conclusion
Blackout Chocolate Cake is not just dessert, it’s an experience. Every bite brings deep chocolate flavor, moist layers, and creamy richness. It’s a recipe that delivers drama and comfort all in one, and once you make it, it’s sure to become a classic in your kitchen too.
Print
Blackout Chocolate Cake
- Total Time: 1 hour 5 minutes
- Yield: 12 servings
- Diet: Vegetarian
Description
A rich, moist blackout chocolate cake layered with creamy chocolate pudding and topped with a coat of chocolate cake crumbs. A nostalgic Brooklyn classic that’s ultra-decadent and unforgettable.
Ingredients
- 1¾ cups all-purpose flour
- ¾ cup unsweetened cocoa powder
- 1½ teaspoons baking powder
- 1½ teaspoons baking soda
- ½ teaspoon salt
- 1 cup granulated sugar
- ½ cup light brown sugar
- 2 large eggs
- 1 cup buttermilk
- ½ cup vegetable oil
- 2 teaspoons pure vanilla extract
- 1 cup hot coffee
- 4 tablespoons unsalted butter
- ¼ cup cornstarch
- 2½ cups whole milk
- 6 ounces semi-sweet chocolate, chopped
- 2 ounces dark chocolate, chopped
- ½ cup powdered sugar (optional, for dusting)
Instructions
- Preheat your oven to 350°F (175°C) and grease two 9-inch round cake pans. Line them with parchment paper.
- In a large bowl, whisk together flour, cocoa powder, baking powder, baking soda, salt, granulated sugar, and brown sugar.
- In a separate bowl, whisk eggs, buttermilk, vegetable oil, and vanilla extract until combined. Stir the wet mixture into the dry ingredients, then mix in the hot coffee until smooth.
- Divide the batter evenly between the two pans. Tap gently to remove air bubbles and bake for 30–35 minutes. Cool on a wire rack.
- In a saucepan, combine whole milk, cornstarch, and granulated sugar over medium heat. Cook until thickened, stirring constantly. Remove from heat and add butter and chopped chocolates. Stir until smooth, then chill until thick.
- Once cakes are cool, slice one layer in half horizontally. Crumble the second layer into fine crumbs.
- Layer cake and pudding starting with cake, then pudding, and repeat. Coat the entire cake with pudding and press chocolate cake crumbs over the top and sides.
- Chill for at least 1 hour before slicing and serving.
Notes
- Use Dutch-process cocoa for deeper flavor and color.
- Chill pudding well to ensure it spreads smoothly.
- Freeze one cake layer slightly before crumbling for easier coating.
- Prep Time: 30 minutes
- Cook Time: 35 minutes
- Category: Dessert
- Method: Baking
- Cuisine: American
Nutrition
- Serving Size: 1 slice
- Calories: 480
- Sugar: 38g
- Sodium: 270mg
- Fat: 24g
- Saturated Fat: 10g
- Unsaturated Fat: 11g
- Trans Fat: 0g
- Carbohydrates: 64g
- Fiber: 4g
- Protein: 6g
- Cholesterol: 55mg